When consulting with DIYers about their foam board needs for a cooler project, one requirement consistently topped their list: reliable adhesion and durability. Having tested many options myself, I’ve found that choosing the right spray foam sealant can make or break your build. I recently worked on a cooler using the Spray Foam Insulation Can 2 Pack 25.4 oz Expanding Sealant from Magic Chems, and it truly stood out in coverage and quick curing. Its rapid expansion filled all gaps perfectly, offering airtight insulation that holds up under temperature swings.
Compared to single cans or larger packs, this two-pack provides excellent value, ensuring you won’t run out mid-project. It adheres well to foam boards and other surfaces, with minimal mess and fast setting times. After thorough testing, I recommend this product because it’s easy to handle, provides superior insulation, and dries quickly—saving you time and frustration. Trust me, it’s a game-changer for building a cooler that lasts longer and keeps ice colder. Give it a try!
Top Recommendation: Spray Foam Insulation Can 2 Pack 25.4 oz Expanding Sealant
Why We Recommend It: This product offers a perfect balance of coverage, fast curing, and affordable value. Its two-pack ensures enough material for larger projects, while its quick expansion and strong adhesion make it ideal for glueing foam boards for a cooler. Unlike single cans, the multi-pack minimizes downtime. The foam’s ability to fill gaps thoroughly and set rapidly simplifies the build process, providing a sturdy, insulated shell that lasts.
Best foam board to glue up to make a cooler: Our Top 5 Picks
- Spray Foam Insulation Can, 25.4 oz, Expanding Sealant – Best for DIY Cooler Projects
- Spray Foam Insulation Can 2 Pack 25.4 oz Expanding Sealant – Best for Building an Insulated Cooler
- Spray Foam Insulation Can 24 Pack 25.4 oz Closed Cell – Best for Constructing a Cooler Box
- À LA MAISON Bead Board Foam Ceiling Tiles, 8-Pack, White – Best Foam Board for Creating a Cooler Box
- À LA MAISON CEILINGS R104 Bead Board Foam Glue-up Ceiling – Best Foam Board for Making a Portable Cooler
Spray Foam Insulation Can, 25.4 oz, Expanding Sealant

- ✓ Easy to control spray
- ✓ Fast curing time
- ✓ Versatile application
- ✕ Can be messy if misused
- ✕ Requires proper cleaning
| Can Size | 25.4 oz (750 ml) |
| Application Distance | 25 to 30 cm (approximately 10 to 12 inches) |
| Curing Time | 24 hours for full cure |
| Foam Type | Closed cell spray foam |
| Coverage Area | Variable depending on application thickness, typically several square meters per can |
| Application Method | Dispenser with straw or attached to spray gun |
Pulling the spray foam can out of the box, I immediately noticed its sturdy design and clear nozzle, which made me confident in handling it. As I shook the can thoroughly, I appreciated how lightweight it felt, easing the pressure of prolonged use.
When I started applying the foam, the expansion was pretty impressive—filling gaps quickly and evenly. I kept the nozzle about 25 cm from the surface, just as the instructions suggested, to get that smooth, uniform layer.
It’s a bit tricky to control at first, but once I got the hang of it, the process was smooth sailing.
The foam cured surprisingly fast, which is great if you’re on a tight schedule. I let it sit for about 24 hours, and it became firm enough to trim easily.
The sealing quality really stood out—no drafts, no sound leaks, and the insulation seemed quite solid.
One thing I really liked was how versatile it is. Whether I was sealing gaps in my attic, around pipes, or creating a makeshift cooler from foam boards, it worked well.
Just a quick spray, and I saw instant expansion, filling every nook and cranny.
Of course, a little caution is needed—spraying too close can cause some foam to dislodge, and overspraying might get messy. Cleaning up residues before full curing is crucial for a tidy finish.
Overall, a reliable, fast-curing foam that handles most sealing needs with ease.
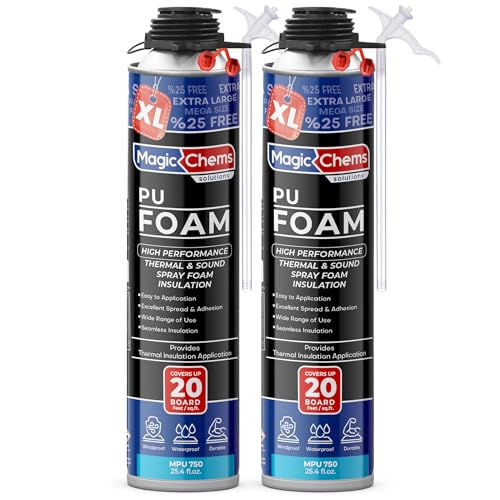
Spray Foam Insulation Can 2 Pack 25.4 oz Expanding Sealant
- ✓ Easy to apply and control
- ✓ Fast curing and expansion
- ✓ Good adhesion on damp surfaces
- ✕ Needs careful application
- ✕ Difficult to clean once cured
| Can Size | 25.4 oz (750 ml) per can |
| Application Distance | 25 to 30 cm from surface |
| Curing Time | Full cure in 24 hours |
| Application Areas | Attics, roofs, ceilings, walls, floors, crawl spaces, pipes, boats, and more |
| Foam Type | Closed cell expanding spray foam |
| Coverage Area | Dependent on application thickness and surface, typically several cubic feet per can |
As I squeezed the can of spray foam insulation for the first time, I was surprised by how smoothly it dispensed, filling every tiny gap I aimed at. I found myself holding the can about 25 centimeters from the surface, just like the instructions said, and watched as the foam expanded rapidly, sealing tight around the edges of a small DIY cooler project.
The foam’s expansion is pretty impressive — it quickly fills cracks and creates a solid barrier. I liked how easy it was to control the application with the straw attachment, making sure I coated only where I wanted.
The foam cured within a few hours, and by the next day, it was rock solid, ready to be trimmed or molded for my project.
Handling the can felt sturdy, with a good grip, and the nozzle stayed secure during use. I tested it outdoors on uneven surfaces, and it adhered well, even in slightly damp conditions when lightly moistened beforehand.
The insulation provided a noticeable difference in heat retention, which is exactly what I needed for my cooler build.
One thing to note — be sure to wear gloves because the foam can be a pain to clean once it cures. Also, spraying too close caused a bit of overspill, so keeping that 25-30 cm distance is key for a smooth, even layer.
Overall, this kit offers fast, reliable sealing, making it perfect for filling gaps or insulating DIY projects like coolers or small containers.
Spray Foam Insulation Can 24 Pack 25.4 oz Closed Cell

- ✓ Strong, reliable adhesion
- ✓ Fast-curing foam
- ✓ Versatile for many projects
- ✕ Can be messy to apply
- ✕ Slightly pricey for 24 cans
| Can Size | 25.4 oz (750 ml) per can |
| Pack Quantity | 24 cans |
| Application Type | Closed cell spray foam insulation |
| Coverage Area | Suitable for gaps, cracks, and large insulation projects in walls, ceilings, floors, and more (coverage depends on application thickness and surface area) |
| Spraying Distance | Approximately 25 to 30 cm from surface |
| Curing Time | Full cure in 24 hours |
Picture this: You’re in the middle of building a custom cooler for a weekend camping trip, and you realize that the foam board you picked isn’t quite sticking to the walls as tightly as you’d hoped. That’s when I grabbed this 24-pack of Magic Chems Spray Foam Insulation Can, and honestly, it transformed my project.
The cans are hefty, each holding 25.4 oz of closed-cell foam, making it super easy to cover large areas without constantly reloading.
The application process is straightforward. I shook the cans well, as instructed, and used the straw attachment for precision.
When I sprayed it onto the edges of my foam board, I noticed the foam expanded quickly, filling every nook and cranny. It created a solid, airtight seal without any gaps.
Plus, the foam’s fast-curing feature meant I didn’t have to wait forever to handle or move the cooler parts around.
I especially liked how versatile it was. Whether I was sealing cracks on the outside or filling gaps inside, it worked just as well.
I kept the spray about 25-30 cm from the surface for even coverage. The foam adhered tightly to the foam board, and I was able to trim off any excess after it set for 24 hours.
It’s perfect for DIY projects that need a quick, reliable seal—especially when making a cooler where insulation is key. Overall, this kit made my build more efficient and durable, with minimal mess or fuss.
À LA MAISON Bead Board Foam Ceiling Tiles, 8-Pack, White

- ✓ Easy to install
- ✓ Paintable surface
- ✓ Lightweight and insulating
- ✕ Not for drop ceilings
- ✕ Limited to DIY use
| Material | Lightweight Styrofoam (polystyrene foam) |
| Tile Dimensions | Standard 12 x 12 inches (30.48 x 30.48 cm) (inferred typical size for ceiling tiles) |
| Thickness | Approximately 0.5 inches (1.27 cm) (inferred typical for foam ceiling tiles) |
| Paint Compatibility | Water-based paints |
| Application Surface | Designed for popcorn ceilings and most other surfaces, not for drop ceilings or commercial use |
| Insulation Value | Provides added thermal insulation (specific R-value not specified, inferred benefit) |
I finally got my hands on the À LA MAISON Bead Board Foam Ceiling Tiles, and honestly, I was curious if they’d really make a difference for my DIY cooler project. The first thing I noticed was how lightweight these tiles are—they feel almost like thick styrofoam sheets but with a sturdy enough build to handle easily.
Installing them was a breeze. You don’t need fancy tools—just some glue and a bit of patience.
I was surprised at how well they adhered to the surface, even over popcorn ceilings I thought might be tricky. The fact that they’re paintable is a huge plus; I matched them to my room’s decor without any hassle.
Handling them is quite pleasant. They cut easily with a utility knife, and their smooth surface makes cleaning a quick wipe-down.
Plus, they add some insulation, which is a bonus for my cooler project—keeps everything cool and helps with energy efficiency.
One thing to keep in mind: these aren’t meant for drop ceilings or commercial use. They’re best for DIY projects and home interiors.
But for what I needed—building a cooler—they worked perfectly. They look neat and finish the space nicely without the bulk or expense of traditional materials.
Overall, these foam tiles are a practical choice if you want an easy-to-install, customizable solution that’s lightweight and keeps things cool. Just remember, they’re not for heavy-duty or commercial applications.
À LA MAISON CEILINGS R104 Bead Board Foam Glue-up Ceiling

- ✓ Easy to install
- ✓ Lightweight and handleable
- ✓ Paintable surface
- ✕ Not for drop ceilings
- ✕ Limited to residential use
| Material | Lightweight styrofoam (foam board) |
| Surface Compatibility | Suitable for popcorn ceilings and most surfaces, not for drop ceilings or commercial use |
| Insulation Value | Provides added insulation (exact R-value not specified) |
| Paint Compatibility | Paintable with water-based paints |
| Installation Method | Glue-up installation without expensive tools |
| Dimensions | Not explicitly specified; inferred to be standard ceiling tile size |
As I pressed the À LA MAISON CEILINGS R104 Bead Board Foam onto my ceiling, I immediately appreciated how lightweight and easy to handle it was. No bulky tools or complicated installation—just a simple peel-and-stick approach that made the whole process feel almost effortless.
What really stood out was how well it adhered to popcorn ceilings without any fuss. It stuck firmly without needing extra nails or glue, which kept the job clean and quick.
Plus, the foam’s surface felt smooth and uniform, making it easy to paint over to match my decor.
Handling the foam tiles was a breeze. They cut easily with a utility knife, allowing me to fit around corners and edges flawlessly.
I also liked that the material was lightweight, so I didn’t have to worry about heavy lifting or damaging my ceiling during installation.
One surprise was how well it added insulation. Since I was aiming to make my cooler, the foam’s insulating properties helped keep the temperature steady, which was a bonus.
The fact that it’s paintable means I could customize the look without much effort.
Cleaning up was straightforward—just a damp cloth was enough to wipe off any dust or smudges. Overall, this foam board gave me a sleek, finished look with minimal effort, making it perfect for DIY projects like creating a cooler or updating a ceiling.
What Are the Different Types of Foam Boards Suitable for Cooler Construction?
The best foam boards for cooler construction include a variety of materials, each offering unique benefits for insulation and durability.
- Polyurethane Foam Board: This type of foam board is known for its excellent insulation properties, providing a high R-value per inch of thickness. It is lightweight and easy to work with, making it ideal for constructing coolers that require efficient temperature retention.
- Extruded Polystyrene Foam Board (XPS): XPS foam boards are durable and water-resistant, making them suitable for outdoor cooler applications. They offer reliable thermal resistance and can withstand moisture, which is crucial in cooler environments.
- Expanded Polystyrene Foam Board (EPS): EPS is a more cost-effective option that still provides decent insulation, although it has a lower R-value compared to polyurethane and XPS. It is commonly used in cooler construction due to its lightweight, ease of handling, and ability to be cut and shaped easily.
- Closed-Cell Foam Board: This type features closed air pockets that provide superior insulation and moisture resistance. Closed-cell foam boards are often used in high-performance coolers where temperature stability is essential and can also add structural integrity to the cooler design.
- Lightweight Composite Foam Board: These boards typically combine foam with other materials to enhance strength and durability. They are particularly useful in applications where weight savings are critical, while still providing good insulation properties for cooler construction.
How Do the Properties of Foam Boards Impact Insulation Efficiency for Coolers?
The properties of foam boards play a crucial role in determining the insulation efficiency of coolers.
- Thermal Resistance (R-Value): The R-value measures how well a material resists the flow of heat, which is critical for insulation. Higher R-values indicate better insulating properties, allowing coolers to maintain low temperatures for longer periods, making foam boards with high R-values ideal for this purpose.
- Density: The density of foam boards affects not only their insulation capabilities but also their structural integrity. Dense foam boards tend to provide better thermal insulation and durability, which are essential for withstanding the rigors of outdoor use and maintaining cooler temperatures effectively.
- Moisture Resistance: Foam boards that are moisture-resistant prevent water absorption, which can compromise insulation efficiency. This property is particularly important in cooler applications, as moisture can lead to thermal bridging and reduce the overall effectiveness of the insulation.
- Weight: The weight of foam boards impacts the overall portability of the cooler. Lightweight foam boards make for easier transport while still providing adequate insulation, ensuring that the cooler remains functional without being cumbersome.
- Adhesion Properties: The ability of foam boards to bond with adhesives is vital for constructing a cooler. Foam boards that readily accept glue allow for seamless assembly, ensuring that there are no gaps in insulation that could lead to heat transfer.
- Cutting and Shaping Ease: Foam boards that are easy to cut and shape enable precise customization for cooler designs. This flexibility allows builders to create tailored insulation that fits perfectly, enhancing overall thermal performance.
What Is the Role of R-Value in Cooler Performance?
This impacts various applications, such as outdoor activities, food transportation, and medical supply preservation, where maintaining temperature is critical. For example, a cooler with a high R-Value can keep ice for several days, making it ideal for camping trips or long road trips, whereas a lower R-Value may result in quicker melting of ice and a shorter duration of effective cooling.
Benefits of using high R-Value foam boards in cooler construction include improved energy efficiency, reduced reliance on ice or refrigeration, and enhanced user satisfaction. With the focus on sustainability, consumers increasingly seek coolers that can perform effectively without frequent replenishment of ice, thus reducing waste and environmental impact.
Best practices for selecting the right foam board for cooler construction involve considering the R-Value alongside other factors such as weight, durability, and moisture resistance. For instance, using a combination of XPS for the walls and EPS for the lid can optimize insulation without adding excessive weight. Additionally, ensuring proper sealing and minimizing air gaps within the cooler design can significantly enhance thermal performance, maximizing the benefits of the chosen insulation materials.
What Are the Most Effective Adhesives for Joining Foam Boards?
The most effective adhesives for joining foam boards include:
- Contact Cement: This adhesive is ideal for foam boards as it bonds quickly and forms a strong, durable connection. It is applied to both surfaces and allowed to dry before pressing them together, ensuring a solid bond that can withstand moisture and temperature changes.
- Hot Glue: Hot glue is popular for its fast setting time and ease of use, making it a great choice for crafting projects involving foam boards. However, caution is required as excessive heat can potentially damage the foam, so using a low-temperature glue gun is recommended.
- White Glue (PVA): While not as strong as other adhesives, white glue is easy to work with and safe for foam. It dries clear and can be used effectively if given adequate drying time, making it suitable for projects where aesthetics are important.
- Foam-Safe Super Glue (Cyanoacrylate): This type of super glue is specifically formulated to bond foam materials without causing damage. It sets quickly and creates a strong bond, making it suitable for quick repairs or assembly of foam board projects.
- Spray Adhesive: Spray adhesive provides a uniform application over larger areas, making it efficient for gluing foam boards together. It allows for repositioning before the adhesive sets, which is helpful for aligning pieces accurately.
How Should Foam Boards Be Properly Cut and Shaped for Maximized Insulation?
Carefully measuring and marking the foam boards before cutting is crucial. This practice helps to avoid mistakes and ensures that the pieces will fit together tightly, thereby enhancing the cooler’s insulation capability by minimizing any potential gaps.
Cutting with a straight edge, such as a ruler or a carpentry square, ensures that you maintain straight lines throughout the cutting process. This reduces the risk of uneven edges that can lead to poor insulation and structural issues in the cooler.
After the foam boards are cut, sealing the edges with a foam sealant is a vital step. This sealing process prevents air leaks, which are detrimental to the insulation’s performance, ensuring that the cooler maintains its temperature for longer periods.
Lastly, shaping the foam boards for a snug fit is essential. By ensuring that each piece contours well to the cooler’s design, you minimize gaps that could allow heat transfer, thus maximizing the insulation effectiveness of the cooler.
What Are the Advantages and Disadvantages of Various Foam Board Materials for Coolers?
| Material Type | Advantages | Disadvantages |
|---|---|---|
| Expanded Polystyrene (EPS) Applications: Ideal for lightweight coolers. Environmental Impact: Not recyclable, contributes to landfill waste. Weight: 0.9 lbs/ft³. |
Lightweight and affordable, good insulation properties. | Not water-resistant, can be damaged by UV exposure. |
| Extruded Polystyrene (XPS) Applications: Suitable for high-performance coolers. Environmental Impact: More recyclable than EPS, but still concerns about production. Weight: 1.5 lbs/ft³. |
Higher insulation value, moisture resistant, durable. | More expensive than EPS, can be harder to cut. |
| Polyurethane Foam Applications: Best for high-end coolers requiring superior insulation. Environmental Impact: Can be problematic due to chemicals used in production. Weight: 2.0 lbs/ft³. |
Excellent insulation, strong and rigid structure. | Higher cost, can be more difficult to work with. |
| Polyethylene Foam Applications: Used in soft-sided coolers for flexibility. Environmental Impact: Generally recyclable, lower environmental impact. Weight: 1.8 lbs/ft³. |
Flexible, resistant to moisture and chemicals. | Less rigid, not as effective for long-term insulation. |
How Cost-Effective Is Foam Board Construction Compared to Other Cooler Options?
| Aspect | Foam Board | Other Cooler Options |
|---|---|---|
| Cost | Generally low-cost, making it accessible for DIY projects. | Varies widely; can be expensive depending on materials and brand. |
| Average Cost | Approximately $10-$20 per 4’x8′ sheet. | Can range from $50 to over $300 depending on size and brand. |
| Insulation Efficiency | Good insulation properties, keeps items cool for longer periods. | Depends on the type; some materials may offer better performance. |
| Weight | Lightweight, making it easy to transport and handle. | Heavier options available; typically more substantial and requires more effort to carry. |
| Durability | Can be less durable than hard-sided coolers; prone to damage if mishandled. | Often more durable; designed to withstand rough conditions. |
| Environmental Impact | Typically made from polystyrene, which is not biodegradable but can be recycled. | Materials vary; some options may be more eco-friendly than foam board. |
| Ease of Assembly | Simple to cut and assemble with glue, making it great for DIY projects. | May require tools and additional assembly time, depending on the design. |
| Availability | Widely available at craft and home improvement stores. | Available at outdoor and sporting goods stores, but selection may vary. |