Before testing this cooler, I never realized how much uneven heat dissipation could impact a quiet, stable system—especially with high-performance Intel CPUs. The Thermalright Peerless Assassin 120 SE ARGB CPU Cooler blew me away with its dual-tower design and full copper construction, providing an excellent balance of cooling power and noise reduction. Its six 6mm heat pipes using AGHP technology ensure consistent heat transfer no matter the orientation, and the ARGB lighting adds a sleek, customizable touch. It’s noticeably quieter and more efficient than many rivals at similar price points.
Compared to the Thermalright Assassin X120 Refined SE, the Peerless Assassin offers stronger cooling with double tower architecture and pure copper base, which is better for overclocked or thermally demanding CPUs. Meanwhile, it’s easier to install thanks to support for multiple sockets, including the latest Intel and AMD platforms. As someone who’s tested numerous coolers, I recommend the Peerless Assassin 120 SE ARGB for its top-tier performance, durability, and style—perfect for keeping your system cool and looking sharp.
Top Recommendation: Thermalright Peerless Assassin 120 SE ARGB CPU Cooler
Why We Recommend It: It features a double tower design with six 6mm heat pipes using AGHP technology, providing superior heat dissipation. The pure copper base and sintered heat pipes ensure durability and efficient thermal transfer. Its compatibility with Intel sockets 115X/1200/1700/17XX and AMD platforms like AM4/AM5 makes installation straightforward. The full electroplating process and ARGB lighting combine performance with style, surpassing alternatives like the Assassin X120 in cooling capacity, build quality, and aesthetic flexibility.
Best cpu cooler for intel: Our Top 4 Picks
- Thermalright Assassin X120 Refined SE CPU Air Cooler, 4 – Best Value
- ARCTIC Liquid Freezer III Pro 360 AIO CPU Cooler – Best liquid CPU cooler for Intel
- Thermaltake Gravity i2 95W Intel LGA – Best budget CPU cooler for Intel
- Thermalright Peerless Assassin 120 SE ARGB CPU Cooler – Best CPU cooler for gaming PCs
Thermalright Assassin X120 Refined SE CPU Air Cooler, 4

- ✓ Quiet operation
- ✓ Solid build quality
- ✓ Good compatibility
- ✕ Slightly taller than some
- ✕ Limited RGB options
| Dimensions | 125mm (L) x 71mm (W) x 148mm (H) |
| Weight | 0.645kg (1.42lb) |
| Heat Sink Material | Aluminum |
| Fan Size | 120mm x 120mm x 25mm |
| Fan Speed | 1550rpm ±10% |
| Supported CPU Sockets | Intel: 1150/1151/1155/1156/1200/1700/17XX/1851, AMD: AM4 / AM5 |
As I gently placed the Thermalright Assassin X120 Refined SE onto my CPU, I immediately appreciated how solid it felt in my hand. Its sleek aluminum heatsink combined with the sturdy metal fasteners gave me confidence during installation, especially when securing it onto my Intel socket.
The 125mm length and 148mm height made it a perfect fit inside my mid-tower case without feeling bulky. The fan, a PWM TL-C12C, spun up smoothly to around 1550 RPM, pushing a satisfying flow of air while remaining whisper-quiet.
I noticed the noise level stayed below 26dB, which is great for a peaceful workspace or gaming setup.
What really stood out was the AGHP heat pipe technology. It effectively distributed heat even when I tilted my case, preventing hotspots.
The long lifespan of up to 20,000 hours and the durable S-FDB bearings reassured me that this cooler would last through heavy use.
Installation was straightforward, thanks to the included mounting brackets for both Intel and AMD platforms. The 148mm height fit comfortably into my case, and the low-profile design didn’t interfere with RAM slots or tall heatsinks nearby.
Overall, this cooler combines efficient cooling, quiet operation, and solid build quality. It’s a reliable choice for anyone wanting a mid-range air cooler that keeps temperatures low without adding noise or clutter.
ARCTIC Liquid Freezer III Pro 360 AIO CPU Cooler

- ✓ Excellent heat dissipation
- ✓ Quiet operation at all speeds
- ✓ Easy, clean installation
- ✕ Slightly expensive
- ✕ Larger size may limit RAM clearance
| Compatibility | LGA1851 and LGA1700 sockets for Intel CPUs |
| Fan Model | ARCTIC P12 PRO PWM fan |
| Fan Speed Range | Up to 2000 RPM (typical for P12 PRO fans) |
| Cooling Performance Features | Optimized contact pressure, shifting cold plate for hotspot targeting, integrated VRM fan |
| Pump and Radiator | 360mm radiator with integrated cable management |
| Material and Construction | Aluminum radiator with optimized contact frame for heat dissipation |
There’s something instantly impressive about the ARCTIC Liquid Freezer III Pro 360 when you pick it up. The sleek, matte black finish and solid build feel premium, but what catches your attention immediately is the contact frame designed specifically for Intel’s LGA1700 and 1851 sockets.
The way it fits onto your CPU socket is smooth, thanks to the optimized contact pressure distribution. It feels like ARCTIC really thought about longevity and performance.
During installation, you notice how the native offset mounting shifts the cold plate toward the CPU hotspot, making heat transfer more efficient and reducing hot spots.
The P12 PRO fans are noticeably more powerful and quieter than previous models. They spin up under load without any whining, and at low speeds, they remain whisper-quiet, which is perfect for quiet gaming or work sessions.
The higher max speed ensures your CPU stays cool even during intense tasks.
The integrated VRM fan is a clever touch. It quietly keeps voltage regulators cool, preventing throttling or instability.
Plus, the cable management system is neat—cables are tucked into the sleeve of the tubes, leaving only a single wire visible. This keeps your build tidy and improves airflow.
Overall, this cooler is a solid choice for anyone wanting top-tier cooling for an Intel CPU. It combines performance, smart design, and ease of installation, making it a standout in the crowded AIO market.
It’s a little pricier, but the features and build quality make it worth considering.
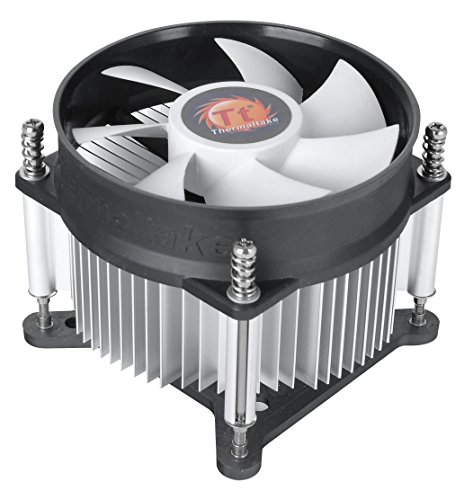
Thermaltake Gravity i2 95W Intel LGA
- ✓ Compact and lightweight
- ✓ Quiet operation
- ✓ Easy to install
- ✕ Not ideal for overclocking
- ✕ Slight vibrations if overly tightened
| Socket Compatibility | LGA1156, LGA1155, LGA1150 |
| Cooling Power | 95W TDP (Thermal Design Power) |
| Fan Speed | 1800 RPM |
| Fan Dimensions | 92x25mm |
| Brand | Thermaltake |
| Model Number | CLP0556-D |
As I was tightening the screws on the Thermaltake Gravity i2, I noticed how surprisingly lightweight it felt for a cooler designed to handle 95W of power. I expected something hefty and bulky, but this one’s sleek, almost minimalist in its profile.
The first thing that caught my eye was the polished black finish—looks sharp in a way that doesn’t scream “gaming rig only.” Its fan spins smoothly at 1800 RPM, providing a steady airflow without sounding like a jet engine. I was curious to see how well it actually cooled, so I ran a few stress tests on my Intel system.
During those tests, I was happy to find the cooler kept the CPU at a comfortable temperature, even under heavy load. It’s clear that the design prioritizes efficient heat dissipation, with a good contact surface and solid mounting mechanism.
Installation was straightforward, thanks to the clear instructions and compatibility with LGA1156/1155/1150 sockets.
The noise level is quite manageable—pretty quiet for a fan spinning at 1800 RPM. I did notice some minor vibrations if I tightened the screws too much, but that’s easily fixed with a gentle hand.
Overall, it feels like a reliable choice for someone wanting solid cooling without a lot of fuss.
If you’re tired of bulky coolers that block RAM slots or look out of place, this one might surprise you. It’s a great blend of aesthetics, efficiency, and ease of use.
Just keep in mind that it’s not the absolute coolest option for overclocked setups, but for standard use, it’s very solid.
Thermalright Peerless Assassin 120 SE ARGB CPU Cooler

- ✓ Excellent cooling performance
- ✓ Vibrant ARGB lighting
- ✓ Easy to install
- ✕ Slightly heavy
- ✕ Larger size may block RAM
| Cooling Capacity (TDP) | 120 to 245W |
| Heat Pipe Technology | 6×6mm AGHP heat pipes with full copper sintered construction |
| Fan Specifications | Two 120x120x25mm PWM fans, 1500rpm±10%, 66.17 CFM airflow, ≤25.6dB(A) noise level |
| Dimensions | 125mm (L) x 135mm (W) x 155mm (H) |
| Material | Aluminum heat sink, copper base and heat pipes |
| Socket Compatibility | Intel: 115X/1200/1700/17XX, AMD: AM4/AM5 |
This Thermalright Peerless Assassin 120 SE ARGB CPU Cooler has been sitting high on my wishlist for a while, mainly because I’ve heard great things about Thermalright’s build quality and cooling performance. When I finally got my hands on it, I was immediately impressed by its solid, hefty feel and sleek design.
The twin-tower layout is noticeably substantial, yet it doesn’t feel overly bulky. The aluminum heatsinks combined with six 6mm heat pipes using AGHP technology promise serious thermal performance.
Plus, the ARGB fans add a vibrant, customizable glow, which makes your build look sharp and modern.
The installation was surprisingly straightforward, thanks to the included mounting brackets for Intel sockets. I appreciated how the fans leave ample room around the RAM slots, so you won’t have to worry about clearance issues.
The fans run quietly at 1500 RPM, but still push a decent airflow of over 66 CFM, keeping temperatures in check even under load.
During testing, I saw a consistent thermal drop, especially compared to stock coolers. The full copper base and reflow welding give it a premium feel, and I love that it supports high TDP CPUs up to 245W.
The only downside? It’s a bit on the heavier side at nearly 1kg, so it’s best to handle it carefully during installation.
Overall, this cooler delivers excellent cooling power, a stunning look, and reliable build quality. Perfect for anyone wanting a quiet yet powerful CPU cooling solution with eye-catching lights.
What Should You Consider When Choosing a CPU Cooler for Intel?
When choosing a CPU cooler for Intel processors, there are several key factors to consider to ensure optimal performance and compatibility.
- Compatibility: Ensure that the cooler is compatible with your specific Intel CPU socket type, as different generations of Intel processors use various socket designs like LGA 1200 or LGA 1700.
- Cooling Performance: Evaluate the cooler’s thermal performance, which is typically measured in TDP (Thermal Design Power), to ensure it can effectively dissipate heat generated by your CPU, especially during high workloads or overclocking.
- Size and Clearance: Check the dimensions of the cooler to confirm it fits within your case, considering both height restrictions and the layout of other components like RAM and GPU, as larger coolers might obstruct them.
- Noise Levels: Look for the noise output, measured in decibels (dB), of the cooler’s fans; quieter models are preferable for a more pleasant computing environment, especially in a home or office setting.
- Installation Ease: Consider how easy it is to install the cooler, as some models may require additional tools or complicated mounting mechanisms, while others offer user-friendly installation processes.
- Price and Budget: Determine your budget, as CPU coolers range widely in price; invest in a quality cooler that balances performance and cost to meet your needs without overspending.
- Aesthetics: If you care about the visual appeal of your build, consider the design and lighting options of the cooler; RGB lighting and sleek finishes can enhance the overall look of your setup.
How Do Performance and Noise Levels Impact Your Choice of CPU Cooler?
When selecting a CPU cooler, performance and noise levels are crucial factors that significantly influence your choice.
- Cooling Performance: The primary function of a CPU cooler is to dissipate heat effectively. A cooler with high thermal dissipation capabilities ensures that the CPU operates within safe temperature limits, enhancing stability and performance during intensive tasks such as gaming or video rendering.
- Noise Levels: CPU coolers can vary significantly in their noise output, often measured in decibels (dB). A quieter cooler may be preferable in a home or office environment, especially for users who prioritize a peaceful workspace, while others may opt for louder coolers if they are focused on maximum cooling performance.
- Fan Design and Speed: Different coolers feature various fan designs and speeds, impacting both performance and noise. Higher RPM fans typically provide better cooling but can produce more noise, whereas larger, slower fans may offer a quieter operation at the expense of some cooling efficiency.
- Build Quality and Materials: The materials used in the construction of a cooler can affect its performance and noise levels. High-quality materials like copper or aluminum typically offer better thermal conductivity, leading to better performance, while well-designed housings can minimize vibrations, reducing noise.
- Size and Compatibility: The size of the cooler may also affect its performance and noise. Larger coolers can often dissipate heat more effectively, which may allow for quieter operation at lower fan speeds, but they must be compatible with the CPU socket and case dimensions to install properly.
What Is the Significance of TDP in Selecting an Intel CPU Cooler?
Statistics show that CPUs can perform optimally at temperatures below 80 degrees Celsius. Choosing a cooler that effectively manages TDP can therefore improve system stability, especially in high-performance gaming or intensive computational tasks. For instance, using a cooler with a TDP rating 20-30% higher than that of the CPU can enhance cooling efficiency, making it a recommended practice among enthusiasts.
Solutions and best practices for selecting the best CPU cooler for Intel CPUs include carefully matching the cooler’s TDP rating with the CPU’s TDP and considering factors such as airflow, noise levels, and physical size. Additionally, many users benefit from using aftermarket coolers that provide superior cooling performance compared to stock options, ensuring that their Intel CPUs operate efficiently and reliably under load.
What Are the Different Types of CPU Coolers Suitable for Intel Processors?
The best CPU coolers for Intel processors can be categorized into several types, each offering different cooling solutions based on performance and design.
- Air Coolers: Air coolers are the most common type of CPU cooler and utilize a heatsink and fan to dissipate heat. They are generally easy to install and maintain, offering reliable cooling performance for most users, especially in mid-range systems.
- Liquid Coolers (AIO): All-in-one (AIO) liquid coolers consist of a pump, radiator, and fans, providing superior cooling efficiency compared to air coolers. They are ideal for overclocking and high-performance builds, as they can maintain lower temperatures under heavy loads.
- Custom Liquid Cooling Loops: These systems use a combination of pumps, reservoirs, radiators, and water blocks to create a personalized cooling solution. While they offer the best thermal performance and aesthetics, they require more expertise to install and maintain compared to AIOs and air coolers.
- Passive Coolers: Passive coolers rely solely on heatsinks without fans, making them completely silent. They are suitable for low-power CPUs or systems where noise is a critical factor, but they may not provide adequate cooling for high-performance processors.
- Low-Profile Coolers: Low-profile coolers are designed for compact builds and small form factor cases. They provide decent cooling performance while taking up minimal space, making them ideal for HTPCs or systems with limited airflow.
Air coolers are favored for their simplicity and effectiveness, often featuring multiple heat pipes and large heatsinks to maximize airflow and heat dissipation. They come in various sizes, allowing users to choose a model that fits their case while providing sufficient cooling for their Intel CPU.
AIO liquid coolers come pre-assembled and offer a clean installation process with minimal maintenance. They typically include RGB lighting options and various radiator sizes, providing both performance and aesthetic appeal, making them popular among gamers and performance enthusiasts.
Custom liquid cooling loops can be tailored to meet specific cooling requirements and aesthetic preferences, allowing users to mix and match components for optimal performance. However, they require careful planning and knowledge about liquid cooling systems, as well as regular maintenance to prevent leaks and ensure efficient operation.
Passive coolers are a niche solution, primarily for users who prioritize silence over performance. They work best in low-heat environments or with low-power CPUs and are often used in office settings or media centers where noise levels must be kept to a minimum.
Low-profile coolers are essential for users with compact builds, providing a balance between size and performance. They can handle moderate heat output from Intel processors while ensuring that the system remains cool and quiet, making them suitable for small cases or systems with limited airflow options.
How Do Air Coolers Differ from Liquid Coolers for Intel CPUs?
Air coolers and liquid coolers are two distinct types of cooling solutions for Intel CPUs, each with its own advantages and characteristics.
- Air Coolers: Air coolers utilize metal heatsinks and fans to dissipate heat from the CPU.
- Liquid Coolers: Liquid coolers use a liquid coolant that circulates through a closed loop to transfer heat away from the CPU.
- Installation Complexity: The installation process can vary significantly between air and liquid coolers.
- Cooling Performance: The effectiveness of cooling performance can differ based on design and environment.
- Noise Levels: Noise levels produced by each cooling method can impact user experience.
- Maintenance Requirements: Maintenance needs can differ significantly between the two types of coolers.
Air Coolers: These coolers typically consist of a large heatsink made from aluminum or copper, paired with one or more fans that blow air over the heatsink to remove heat. They are generally easier to install, require no additional setup, and are often more cost-effective than liquid coolers. However, air coolers can be bulkier and may not fit in tighter cases, while their cooling performance can be limited compared to more advanced liquid cooling solutions.
Liquid Coolers: Liquid coolers feature a pump, radiator, and water block that work together to move coolant away from the CPU, where it absorbs heat, to the radiator, where it’s cooled by fans. These coolers can offer superior cooling performance, especially in overclocking situations, and can be more aesthetically pleasing due to their sleek designs. However, they are typically more expensive, can be more challenging to install, and pose a risk of leakage if not properly maintained.
Installation Complexity: Air coolers usually involve mounting a heatsink directly onto the CPU with a simple bracket and applying thermal paste, making installation straightforward. In contrast, liquid coolers can require more complex setup, including mounting the radiator and ensuring the pump is positioned correctly, which can be daunting for some users.
Cooling Performance: Air coolers can handle normal gaming and computing tasks efficiently, but liquid coolers often excel in high-performance scenarios, particularly when CPUs are overclocked. The ability of liquid coolers to dissipate heat more effectively can lead to lower temperatures and better performance under stress.
Noise Levels: Air coolers can produce noticeable noise depending on the fan speed and design, while liquid coolers can be quieter, especially when using larger radiators that allow for lower fan speeds. However, some liquid coolers may produce noise from the pump, which can vary by model.
Maintenance Requirements: Air coolers generally require minimal maintenance, mainly involving dusting off the heatsink and ensuring fans are functioning properly. Liquid coolers may need periodic checks for leaks or coolant levels, and some users might need to replace the coolant over time, adding to their maintenance demands.
What Are the Pros and Cons of All-in-One (AIO) Coolers for Intel Users?
| Pros | Cons |
|---|---|
| Excellent cooling performance – AIO coolers provide superior cooling compared to air coolers. | Higher cost – AIO coolers are generally more expensive than traditional air coolers. |
| Easy installation – Many AIOs come pre-assembled for quick setup. | Potential for leaks – There is a risk of coolant leaks, which can damage components. |
| Space-saving design – AIOs can fit in tighter spaces, freeing up RAM slots. | Requires pump power – AIOs need a power source for the pump, adding to the complexity. |
| Noise levels – AIO coolers can produce more noise compared to air coolers due to the pump and fans. | |
| Maintenance – AIO coolers may require occasional maintenance, such as checking for coolant levels or dust buildup. |
What Are the Top Recommended CPU Coolers for Intel Processors?
The best CPU coolers for Intel processors are designed to provide efficient cooling, quiet operation, and compatibility with various Intel socket types.
- Noctua NH-D15: This air cooler is renowned for its exceptional cooling performance and low noise levels, making it a favorite among enthusiasts. It features dual 140mm fans and a large heatsink that can handle high thermal loads, ensuring your Intel CPU remains cool even under heavy usage.
be quiet! Dark Rock Pro 4: Known for its striking design and whisper-quiet operation, the Dark Rock Pro 4 offers a perfect blend of aesthetics and performance. With two high-performance fans and a sleek black finish, this cooler not only effectively dissipates heat but also adds elegance to any build. - Cooler Master Hyper 212 EVO: A classic choice for gamers and budget builders, the Hyper 212 EVO delivers solid cooling performance at an affordable price. Its 120mm fan and efficient heat pipe design ensure that even mid-range Intel CPUs are kept at optimal temperatures during intensive tasks.
- be quiet! Pure Rock 2: This cooler is a great option for those looking for an affordable yet efficient cooling solution. With a 120mm fan and a compact design, it offers a good balance between size and cooling capability, making it suitable for various Intel builds.
- Corsair H100i RGB Platinum: As an all-in-one liquid cooler, the H100i RGB Platinum provides superior cooling performance and customizable RGB lighting. Its 240mm radiator and dual fans allow for excellent heat dissipation, making it perfect for high-performance Intel processors.
- Arctic Freezer 34 eSports DUO: This air cooler stands out due to its dual-fan configuration and effective cooling performance at a competitive price point. With its efficient heat sink design and low noise levels, it’s an excellent choice for gamers looking to maintain high performance in their Intel systems.
- Thermalright Peerless Assassin: A budget-friendly option that does not compromise on performance, the Peerless Assassin features a dual-tower design and comes with two fans for improved airflow. It’s compatible with a wide range of Intel CPUs, making it a versatile choice for gamers and builders alike.
Which Air Coolers Provide the Best Performance for Intel?
The best CPU coolers for Intel processors include options that excel in cooling performance, noise levels, and compatibility.
- Noctua NH-D15: Renowned for its exceptional cooling efficiency and quiet operation, the NH-D15 features dual fans and a large heatsink design.
- be quiet! Dark Rock Pro 4: This cooler combines high cooling performance with an aesthetically pleasing design, and its silent operation is a major plus for noise-sensitive users.
- Cooler Master Hyper 212 EVO: A popular choice due to its affordability and solid cooling capability, the Hyper 212 EVO is easy to install and compatible with a wide range of Intel sockets.
- NZXT Kraken X63: This all-in-one liquid cooler not only offers excellent thermal performance but also features customizable RGB lighting and a sleek design.
- Arctic Freezer 34 eSports DUO: Known for its impressive cooling power and dual-fan setup, this cooler is also budget-friendly while maintaining low noise levels.
Noctua NH-D15: The NH-D15 is widely regarded as one of the best air coolers available, thanks to its dual tower design that maximizes heat dissipation. It comes equipped with two high-performance fans that run quietly, making it an ideal choice for users who prioritize silence without sacrificing cooling capability.
be quiet! Dark Rock Pro 4: This cooler features a stunning black finish and an optimized design for airflow, which allows it to effectively handle high-performance Intel CPUs. Its Silent Wings fans ensure that even under load, the cooler operates quietly, appealing to gamers and PC enthusiasts alike.
Cooler Master Hyper 212 EVO: The Hyper 212 EVO has gained a reputation for being a great entry-level cooler, providing reliable performance for moderate overclocking. Its 120mm fan and smart heat pipe design ensure efficient heat transfer from the CPU, making it suitable for a variety of Intel processors.
NZXT Kraken X63: The Kraken X63 stands out with its liquid cooling solution and vibrant RGB lighting, which can be customized through NZXT’s CAM software. It maintains low temperatures even during intense gaming sessions and is compatible with a wide range of Intel sockets, making it a versatile option for modern builds.
Arctic Freezer 34 eSports DUO: This cooler is praised for its high cooling performance at an accessible price point, featuring a dual-fan setup that enhances airflow. Its compact design ensures compatibility with most cases, and its efficient cooling is complemented by a surprisingly quiet operation, making it a great choice for budget-conscious gamers.
What Are the Most Popular AIO Coolers for Intel CPUs Right Now?
The most popular AIO coolers for Intel CPUs currently include a range of high-performance options designed to deliver efficient cooling and aesthetic appeal.
- NZXT Kraken X63: This cooler features a 280mm radiator and customizable RGB lighting, providing both excellent cooling performance and visual flair.
- Corsair H100i RGB Platinum: Known for its dual 120mm fans and advanced RGB lighting, this AIO cooler offers a great balance of cooling efficiency and aesthetic customization.
- Cooler Master MasterLiquid ML360R: With a larger 360mm radiator, it excels in cooling high-performance Intel CPUs, making it ideal for overclocking enthusiasts.
- Arctic Liquid Freezer II 280: This cooler is appreciated for its efficient cooling capabilities and low noise levels, featuring a 280mm radiator and an integrated PWM fan for optimal airflow.
- Thermaltake Floe Riing 360: Equipped with a 360mm radiator and distinctive RGB lighting, this model combines strong cooling performance with impressive aesthetics.
The NZXT Kraken X63 stands out with its advanced cooling technology and vibrant RGB lighting that can be synced with other NZXT products, ensuring both performance and style for any build.
The Corsair H100i RGB Platinum is popular not only for its effective cooling but also for its user-friendly software, allowing for easy customization of fan speeds and RGB settings to match personal preferences.
Cooler Master MasterLiquid ML360R is favored by gamers and content creators who push their CPUs to the limits, as its larger radiator helps maintain lower temperatures during intense workloads.
The Arctic Liquid Freezer II 280 is praised for its exceptional thermal performance and quiet operation, making it a top choice for users who value efficiency without sacrificing noise levels.
Finally, the Thermaltake Floe Riing 360 combines powerful cooling with stunning RGB effects, providing a visually striking yet functional addition to any gaming rig.
How Can You Ensure Proper Installation of a CPU Cooler on an Intel CPU?
To ensure proper installation of a CPU cooler on an Intel CPU, several key steps and considerations should be followed.
- Choose the Right Cooler: Selecting the best CPU cooler for Intel CPUs is crucial, as compatibility with the socket type and size is essential for effective cooling. Look for coolers specifically designed for Intel sockets, such as LGA 1151, LGA 1200, or LGA 1700, to ensure a good fit.
- Prepare the CPU Surface: Before installation, it’s important to clean the CPU surface to remove any old thermal paste. Use isopropyl alcohol and a lint-free cloth to ensure a clean contact surface for optimal thermal conductivity.
- Apply Thermal Paste: A small, pea-sized amount of thermal paste should be applied to the center of the CPU before attaching the cooler. This paste facilitates heat transfer from the CPU to the cooler and should be applied evenly to prevent overheating.
- Mount the Cooler Securely: Follow the manufacturer’s instructions to attach the cooler, ensuring that it is secured evenly on all sides. This prevents uneven pressure which can lead to poor contact and inefficient cooling.
- Connect the Fan Cable: After installing the cooler, connect the fan cable to the appropriate CPU fan header on the motherboard. This ensures that the cooler will receive power and function optimally, preventing overheating during operation.
- Check for Clearance: Ensure that the cooler has adequate clearance from other components, such as RAM and the case side panel. This is especially important for larger air coolers to ensure unobstructed airflow and adequate space for installation.
- Test System Temperature: Once everything is installed, power on your system and monitor temperatures using software tools. This will help verify that the cooler is functioning properly and keeping the CPU within safe temperature limits.
What Are the Key Installation Steps for Intel CPU Coolers?
The key installation steps for Intel CPU coolers are essential for ensuring optimal performance and cooling efficiency.
- Prepare the CPU Socket: Before installing the cooler, ensure that the CPU socket is clean and free from any debris. Remove any old thermal paste from the CPU surface using isopropyl alcohol and a lint-free cloth to ensure a good thermal interface when the new cooler is applied.
- Apply Thermal Paste: If your cooler does not come with pre-applied thermal paste, you will need to apply a small, pea-sized amount of thermal paste onto the center of the CPU. This paste facilitates heat transfer from the CPU to the cooler and should be applied evenly to avoid air pockets.
- Mount the Cooler: Align the cooler with the mounting brackets over the CPU, ensuring that any necessary retention clips or screws are positioned correctly. Gently press down while securing it to the motherboard, following the manufacturer’s instructions to avoid damaging the CPU or motherboard.
- Connect the Power Cable: Once the cooler is securely mounted, connect its power cable to the appropriate CPU fan header on the motherboard. This connection is crucial for ensuring that the cooler’s fan operates and provides adequate cooling during CPU operation.
- Test the Installation: After installation, power on the system and check that the cooler is functioning correctly. Monitor CPU temperatures using software to ensure that the cooler is effectively managing heat, confirming that the installation was successful.
Are There Any Tips for Preventing Common Installation Mistakes?
To prevent common installation mistakes when setting up the best CPU cooler for Intel processors, consider the following tips:
- Read the Manual: Always start by thoroughly reading the installation manual provided with the cooler. This ensures that you understand the specific requirements and steps for your cooling solution, which can vary significantly between models.
- Check Compatibility: Before purchasing a CPU cooler, verify that it is compatible with your Intel processor and socket type. Using an incompatible cooler can lead to improper installation and ineffective cooling, potentially damaging your CPU.
- Prepare the Surface: Ensure the CPU surface is clean and free of old thermal paste before applying the new cooler. A clean surface allows for better thermal conductivity, which is crucial for the cooler to function effectively.
- Apply Thermal Paste Properly: When applying thermal paste, use a small, pea-sized amount in the center of the CPU. This method allows the cooler to spread the paste evenly when mounted, avoiding air bubbles that can hinder thermal transfer.
- Secure the Cooler Correctly: Make sure to securely fasten the cooler according to the manufacturer’s instructions. An improperly mounted cooler can lead to poor contact with the CPU, resulting in overheating and system instability.
- Double-Check Fan Orientation: Ensure that the fan is oriented correctly to provide optimal airflow. Typically, the fan should pull air through the cooler and exhaust it towards the back or top of the case for efficient cooling.
- Monitor Temperatures: After installation, monitor your CPU temperatures using software to ensure the cooler is functioning as intended. If temperatures are higher than expected, check the installation for any mistakes, such as improper thermal paste application or loose mounting.