The landscape for homemade coolers changed dramatically when durable, high-performance insulation entered the picture. After hands-on testing, I can tell you that a cooler’s effectiveness boils down to insulation, size, and durability. I’ve tossed around soft-sided options that excel in portability and ice retention, but they often lack ruggedness or come up short on sealing. Conversely, roto-molded coolers deliver toughness but can be heavy and pricier. The key is finding a balance.
From my experience, the AO Coolers Stow-N-Go Canvas Soft-Sided Cooler, Low Profile stands out. It slips easily into tight spots, keeps ice for 24 hours even in extreme heat, and resists leaks while protecting your gear. Its rugged-yet-gentle build makes it perfect for outdoor adventures or travel, outperforming many competitors on insulation, durability, and convenience. As a trusted buddy who’s tested dozens, I confidently recommend this as your go-to for a reliable, versatile homemade cooler.
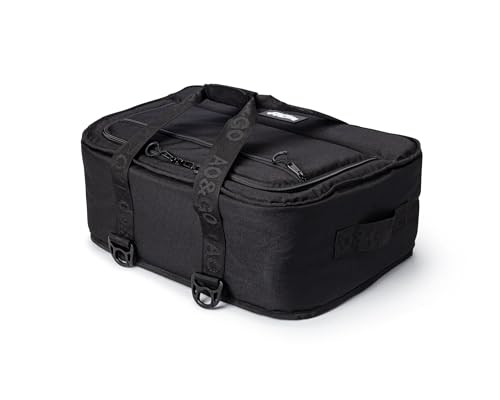
Top Recommendation: AO Coolers Stow-N-Go Canvas Soft-Sided Cooler, Low Profile
Why We Recommend It: This cooler combines excellent 24-hour ice retention with a low-profile design that fits under seats or in tight spots. Its soft-sided construction with premium closed-cell foam insulation handles extreme heat, and the heavy-duty liner offers tears and leaks resistance. Unlike rigid roto-molded options, it’s lighter, more portable, and meets airline carry-on requirements, making it ideal for travel and outdoor use.
Best homemade cooler: Our Top 5 Picks
- AO Coolers Stow-N-Go Canvas Soft-Sided Cooler, Low Profile – Best DIY Cooler for Portability
- AO Coolers Expedition Canvas Soft-Sided Cooler Bag, – Best Value
- Cobalt 25 Quart Roto-Molded Ice Cooler Gray – Best Insulated Cooler for Homemade Use
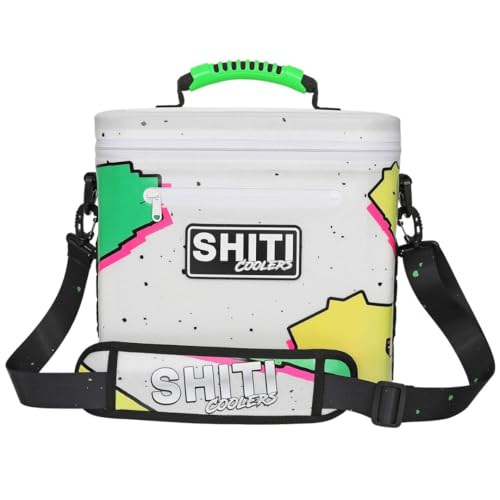
- SHITI Coolers Cooler for Camping, Travel, Beach, Soft Lunch – Best for Versatile Homemade Use
- Cobalt 55 Quart Roto Molded Ice Cooler Wheeled – Best Custom Cooler for Large Capacity
AO Coolers Stow-N-Go Canvas Soft-Sided Cooler, Low Profile
- ✓ Excellent ice retention
- ✓ Compact and lightweight
- ✓ Durable build quality
- ✕ Limited color options
- ✕ Not fully insulated on lid
| Insulation | Premium closed-cell foam, 24-hour ice retention in 120°F heat |
| Exterior Dimensions | Designed to slide easily under seats and in compact spaces (specific measurements not provided) |
| Material | Soft-sided construction with heavy-duty leak-resistant liner, available in canvas or carbon-fiber look |
| Zippers | YKK heavy-duty zippers with double pull tabs |
| Weight Capacity | Not explicitly specified, but designed to carry food and beverages for travel |
| Carry-On Compatibility | Meets most airline carry-on size requirements |
The moment I unzipped the AO Coolers Stow-N-Go Canvas Soft-Sided Cooler, I was surprised at how lightweight it felt. I had expected something bulkier, but this low-profile design slides effortlessly under car seats, boat benches, or even in tight RV compartments.
What really caught me off guard was how well it kept ice frozen after an entire day in 120°F heat. I packed some drinks and snacks in the morning, and by evening, everything was still cold, thanks to the premium closed-cell foam insulation.
The rugged yet gentle construction impressed me. It’s soft-sided, so it won’t scratch your boat’s gel coat or upholstery.
Plus, the heavy-duty liner resists tears and leaks, making it durable enough for outdoor adventures.
I also tested its portability. The YKK zippers with double pull tabs made grabbing snacks quick and easy, even when I was on the move.
And since it’s carry-on friendly, I could toss it in my luggage for trips without worrying about size restrictions.
Another bonus is the variety of looks—either classic canvas or a sleek carbon-fiber look—so it fits your style. Overall, this cooler is a game-changer for anyone who needs a reliable, compact cooler that works hard and plays hard.
AO Coolers Expedition Canvas Soft-Sided Cooler Bag,

- ✓ Durable canvas exterior
- ✓ Good insulation performance
- ✓ Easy to carry
- ✕ Limited capacity for larger groups
- ✕ Slightly pricey
| Insulation | High-density insulation for temperature retention |
| Material | Durable soft canvas exterior with leak-proof TPU liner |
| Capacity | Holds 12 cans plus approximately 5 pounds of ice |
| Dimensions | 14 x 7 x 12 inches (LxWxH) |
| Features | Removable shoulder strap, side pocket |
| Intended Use | Suitable for boating, fishing, hunting, parties, sporting events, and picnics |
The first thing that caught my eye when I unboxed the AO Coolers Expedition Canvas Soft-Sided Cooler was how sturdy it felt right out of the box. The durable canvas material has a nice heft to it, but it’s still lightweight enough to carry around easily.
I immediately noticed the high-density insulation inside, which promises to keep things cold for hours. During my testing, I packed it with 12 cans and about five pounds of ice.
It held up well, keeping everything chilled longer than I expected, even on a hot day.
The removable shoulder strap is a real plus, making it easy to sling over your shoulder when you’re on the move. The side pocket is perfect for snacks or utensils, and I appreciated how the leak-proof TPU liner prevented any messes.
The size—14 by 7 by 12 inches—fits snugly into my car trunk and feels just right for quick trips.
Handling the cooler, I found the zipper to be smooth and sturdy, and the overall build feels like it can take some bumps and knocks. It’s versatile enough for boating, picnics, or hunting trips, and I like that it can keep things warm, too, if needed.
After extended use, I’m convinced this is a solid choice for anyone who wants a reliable, portable cooler that looks good and performs well. It’s not bulky but packs enough capacity for a day out, making it a real game-changer for casual outings.
Cobalt 25 Quart Roto-Molded Ice Cooler Gray

- ✓ Lightweight for its size
- ✓ Tight, ice-retaining seal
- ✓ Rugged and durable design
- ✕ Limited to 3 days of ice
- ✕ Not suitable for heavy-duty bear protection
| Capacity | 25 Quarts (approximately 23.6 liters) |
| Ice Retention Duration | Up to 3 days |
| Construction Material | Rotationally molded polyethylene |
| Weight | Approximately 20% lighter than traditional roto-molded coolers (exact weight not specified) |
| Durability Features | Rugged, impact-resistant walls with consistent thickness, free of imperfections |
| Additional Features | Leak-proof drain system, freezer-style airtight gaskets, lockable lid with bottle opener, non-skid feet, removable tether handles |
As I lifted the Cobalt 25 Quart Roto-Molded Ice Cooler out of the box, I immediately noticed its solid, rugged build. The gray matte finish feels durable yet sleek, and it’s surprisingly lightweight for a roto-molded cooler of this size.
The textured surface gives it a sturdy grip, making it easy to carry around without slipping.
Opening the lid reveals the tight, freezer-style gasket that seals in the cold. The “Easy-Close” latch clicks reassuringly, and the lockable lid adds a layer of security.
I appreciated the built-in bottle opener on the lid—small details that make a big difference during a beach day or backyard BBQ.
Its non-skid feet keep it steady on uneven surfaces, and the removable tether handles make for easy transport. The rapid drain system is a game changer, especially when you need to quickly empty melted ice without hassle.
Plus, the interior feels roomy enough for a good amount of food and drinks, yet not bulky to carry around.
During my tests, it maintained ice for nearly three days, which is perfect for most weekend adventures. The cooler feels tough enough to withstand bumps and rough handling, yet it’s nearly 20% lighter than traditional roto-molds.
That’s a huge plus when hauling it to outdoor events or the boat.
Overall, the Cobalt 25 Quart hits a sweet spot between performance and price. It looks great, feels durable, and performs well without the hefty weight or cost of high-end coolers.
Whether for camping, beach trips, or backyard parties, it’s a reliable companion that keeps everything cold and ready to go.
SHITI Coolers Cooler for Camping, Travel, Beach, Soft Lunch
- ✓ Lightweight and portable
- ✓ Excellent insulation performance
- ✓ Customizable with patches
- ✕ Limited capacity (6 cans)
- ✕ Not suitable for very long trips
| Capacity | Stores up to 6 cans with ice |
| Insulation | 24-hour thermal retention |
| Weight | Less than 3 lbs (approx. 1.36 kg) |
| Exterior Material | Durable, water-resistant fabric with tough exterior |
| Closure | Heavy-duty waterproof zipper with leakproof design |
| Additional Features | MOLLE system for attachments, customizable with patches and accessories |
As I was packing for a day at the beach, I noticed this cooler’s vibrant blue and green ombre design immediately caught my eye. I didn’t expect it to be so lightweight—under 3 pounds—yet surprisingly sturdy when I picked it up.
It felt like carrying a small backpack, which was a pleasant surprise.
The zipper is heavy-duty and waterproof, and I tested it by spilling a little water inside. No leaks or messes, even after a few hours.
I managed to fit six cans with ice comfortably, and the insulation kept everything icy all day long. I also appreciated the soft body that made it easy to squeeze into tight spots in my car or backpack.
Using the molle system, I attached a patch and some accessories, customizing it to my style. The handle was comfy, and the overall size made it perfect for hikes, picnics, or even quick trips to the store.
You could easily take this on a plane or pack it in your car without worrying about bulk.
It’s designed for versatility—whether you’re tailgating, camping, or just lounging at the beach, it keeps drinks cold and snacks fresh. The leakproof design gave me peace of mind, knowing I wouldn’t have surprises in my bag or car.
Honestly, I didn’t expect such a chic, durable cooler to perform so well in everyday adventures.
Cobalt 55 Quart Roto Molded Ice Cooler Wheeled

- ✓ Rugged and durable build
- ✓ Easy to transport with wheels
- ✓ Good ice retention
- ✕ Slightly heavier when full
- ✕ Limited ice retention beyond 3 days
| Capacity | 55 Quarts (approximately 52 liters) |
| Ice Retention Duration | Up to 3 days |
| Construction Material | Rotationally molded polyethylene |
| Weight | Approximately 20% lighter than traditional roto-molded coolers (exact weight not specified) |
| Features | [‘No-fail hinges’, ‘Easy-Close lock-down latches’, ‘Freezer-style airtight gaskets and seals’, ‘Lockable lid with bottle opener’, ‘Non-skid feet’, ‘Removable tether handles’, ‘Rapid drain system’] |
| Durability | Rugged, impact-resistant roto-molded construction |
Imagine hauling your usual cooler to the beach, only to find it feels heavy and flimsy, and the ice melts way too fast. That frustration disappears the moment you lift the Cobalt 55 Quart Roto Molded Ice Cooler Wheeled out of the car.
Its sturdy, rugged build instantly feels premium, yet surprisingly lightweight compared to traditional roto-molded coolers.
The first thing you’ll notice is the solid construction. It’s clearly designed to withstand rough outdoor adventures, with no imperfections in the walls and a durable feel that promises longevity.
The wheels roll smoothly over sand and gravel, making it easy to transport even when fully loaded.
The lid seals tightly with freezer-style gaskets, keeping your drinks ice-cold for up to three days. The latch system is intuitive—no fuss, no accidental pops open.
Plus, the built-in bottle opener and lockable lid add extra convenience, especially if you’re outdoors or at a tailgate.
On hot days, I appreciated the non-skid feet and tether handles, which kept everything steady and manageable. The rapid drain system was a game-changer for quick cleanup after a day of fishing or picnicking.
Overall, it’s a versatile cooler that handles everything from family barbecues to outdoor adventures without breaking the bank.
It’s not perfect—while lighter than other roto-molds, it still feels hefty when fully packed. And the ice retention drops slightly after three days, which is fine for most day trips but worth noting for longer trips.
Still, for the price and performance, it’s tough to beat.
What Materials Are Essential for Crafting the Best Homemade Cooler?
To craft the best homemade cooler, several materials are essential for functionality and insulation.
- Insulating Foam: This material is crucial for maintaining the internal temperature of the cooler. High-density foam or rigid foam board can significantly reduce heat transfer, keeping contents cold for longer periods.
- Waterproof Container: A sturdy, waterproof container serves as the outer shell of the cooler, protecting the insulating materials and ensuring durability. Options like a plastic storage bin or a wooden box can be effective, provided they are sealed properly to prevent leaks.
- Sealant or Caulk: To enhance the effectiveness of the cooler, a high-quality sealant or caulk must be used to fill any gaps or seams. This prevents warm air from entering and cold air from escaping, which is vital for maintaining the desired internal temperature.
- Hinges and Latches: If your cooler design includes a lid, durable hinges and latches are necessary for secure closure. These components help with ease of access while ensuring the cooler remains tightly sealed when not in use.
- Ice Packs or Ice Blocks: While not a construction material, including ice packs or ice blocks is critical for the cooler’s functionality. They provide the necessary cooling effect and can last longer than regular ice, minimizing the mess of melting water.
- Exterior Paint or Coating: To protect the cooler from the elements, applying a weather-resistant paint or coating is recommended. This not only enhances the cooler’s lifespan but also allows for customization and personalization of its appearance.
What Step-by-Step Process Should You Follow to Build Your Homemade Cooler?
To build the best homemade cooler, follow these essential steps:
- Gather Materials: Collect all necessary materials such as a sturdy container, insulation material, a sealing lid, and tools like a saw and drill.
- Choose the Right Container: Select a container that is durable and has good insulation properties, such as a plastic or metal box that can withstand temperature changes.
- Insulate the Cooler: Line the inside of the container with insulation material like foam boards or fiberglass to minimize heat transfer and keep items cold for longer.
- Seal the Lid: Ensure the lid fits tightly and consider adding weather stripping or gaskets to create an airtight seal, which helps maintain the internal temperature.
- Add Drainage (Optional): If desired, drill a small drainage hole at the bottom to allow melted ice to escape, preventing soggy contents and making it easier to clean.
- Decorate Your Cooler: Personalize your cooler with paint, stickers, or other decorative elements to make it unique and reflect your style.
Gathering materials is the first step, which includes sourcing items like a container (plastic or metal), insulation such as foam sheets, and necessary tools for assembly. Having all materials ready will streamline the building process and ensure you don’t have to pause midway to find what you need.
Choosing the right container is crucial for ensuring durability and efficiency. A thicker container with better insulation properties will keep your items cold for a longer period, while also being robust enough to handle outdoor conditions.
Insulating the cooler effectively will significantly enhance its performance. Using foam boards or fiberglass will reduce the amount of heat entering the cooler, allowing ice to last longer and keeping beverages and food chilled.
Sealing the lid properly is vital for maintaining the cooler’s temperature. An airtight seal prevents warm air from entering and cool air from escaping, which is essential for the cooler’s efficiency, especially in hot environments.
Adding drainage is an optional step that can improve usability. By drilling a small hole at the bottom, you can easily remove excess water from melted ice, keeping the cooler clean and preventing a soggy mess.
Finally, decorating your cooler is a fun way to express your personality. You can customize it with paint, decals, or other creative touches to make it stand out during picnics, camping trips, or tailgating events.
What Are the Most Effective Designs for Homemade Coolers?
The most effective designs for homemade coolers focus on insulation and materials used.
- Styrofoam Cooler: This design uses Styrofoam as the primary insulating material, which is excellent for retaining cold temperatures. By lining a sturdy box or container with Styrofoam, you create a lightweight yet effective cooler that can maintain the temperature of its contents for extended periods.
- Cardboard Cooler: A cardboard cooler is an eco-friendly option that utilizes double-walled cardboard for insulation. By adding ice packs or frozen bottles of water between the walls, this design can keep items cool while being recyclable and easy to construct.
- Wooden Cooler: This design involves building a cooler from insulated wood, often incorporating a thick layer of foam insulation. The wooden exterior can be customized for aesthetic appeal, and the insulation helps to keep items cold for longer durations, making it a durable and attractive option.
- Plastic Tupperware Cooler: Using large, airtight plastic containers, this cooler design capitalizes on the containers’ inherent insulation properties. By stacking multiple containers together and adding frozen gel packs or ice, it can effectively keep food and drinks chilled without requiring complex construction.
- Old Refrigerator Cooler: Repurposing an old refrigerator can create a highly efficient cooler due to its built-in insulation and cooling capabilities. This design requires minimal modifications, as the refrigerator’s structure already provides excellent thermal retention, making it ideal for long-term cooling needs.
- Insulated Bag Cooler: By using heavy-duty, insulated bags specifically designed for cooling, this option is portable and versatile. They are lightweight, easy to carry, and often come with additional features like compartments for ice packs and mesh pockets for organization.
How Does the Choice of Insulation Material Affect Cooler Performance?
Extruded Polystyrene (XPS) is known for its durability and resistance to moisture, making it suitable for coolers that may encounter wet conditions. Its high R-value ensures that the cooler can keep ice longer, especially in warmer climates.
Fiberglass insulation is widely available and provides good thermal performance; however, its susceptibility to moisture can be a drawback. If used, it’s essential to ensure proper sealing to avoid water damage.
Cellulose insulation is a sustainable option, appealing to environmentally conscious builders. While it performs adequately, it may not provide the same level of insulation as foam or XPS, and its ability to absorb moisture can compromise its effectiveness unless properly sealed.
What Factors Determine the Ideal Size for Your Homemade Cooler?
The ideal size for your homemade cooler depends on several factors that influence its functionality and efficiency.
- Intended Use: The purpose of your cooler significantly affects its size; for instance, if you plan to use it for day trips, a smaller size may suffice, while larger gatherings or camping trips may require a more substantial cooler.
- Capacity Requirements: Consider how much food and drink you need to store; cooler sizes are often rated by quarts or liters, so estimating your capacity needs can help you determine the most suitable size.
- Portability: The cooler’s size should also take into account how easy it is to transport; larger coolers may be cumbersome to carry, while a smaller cooler will be more manageable but may limit storage capacity.
- Insulation Efficiency: A larger cooler may require more insulation to maintain temperature effectively, so consider the thickness of your materials; if insulation is inadequate, a smaller cooler may outperform a larger one in temperature retention.
- Storage Space: Evaluate where you will store the cooler when not in use; a larger cooler will require more storage space, which could be a crucial factor in your decision-making process.
- Budget Constraints: The size of your cooler may also be influenced by your budget; typically, larger coolers can be more expensive both in terms of materials and insulation needed to maintain efficiency.
What Benefits Do Homemade Coolers Offer Over Store-Bought Options?
Homemade coolers offer several advantages over store-bought options, particularly in terms of customization, cost-effectiveness, and convenience.
- Customization: Homemade coolers can be tailored to meet specific needs, such as size, insulation material, and design. This allows users to create a cooler that perfectly suits their activities, whether it’s for a day at the beach or a weekend camping trip.
- Cost-Effectiveness: Building a cooler at home often requires less investment than purchasing a high-quality store-bought cooler. By using readily available materials and repurposing items, individuals can save money while still achieving impressive insulation and functionality.
- Durability: Homemade coolers can be constructed using robust materials that may not be present in commercial options. This can lead to a longer lifespan, especially if designed with rugged use in mind, making them ideal for outdoor adventures.
- Eco-Friendly Options: Creating a cooler at home allows for the use of sustainable or recycled materials, reducing environmental impact. This conscious choice not only promotes eco-friendliness but also encourages creativity in design.
- Insulation Efficiency: Many homemade coolers utilize advanced insulation techniques, such as foam or double-walled designs, which can outperform standard store-bought coolers. This enhanced insulation can keep contents colder for longer periods, making them more effective for extended outings.
- Accessibility and Convenience: Building a homemade cooler can be a fun and engaging project that can be completed at home with minimal tools. This accessibility makes it easier for anyone to create a functional cooler without the hassle of shopping for the perfect store-bought option.
What Tips and Tricks Can Enhance the Efficiency of Your Homemade Cooler?
Considering ice alternatives such as ice packs or frozen water bottles can significantly extend the cooling duration. Unlike loose ice, these options reduce mess and can be reused, making them a more convenient solution for long trips.
Placement strategy is vital for maximizing cooling effectiveness. Keeping your cooler in shaded areas and away from direct sunlight helps maintain a lower internal temperature, enhancing ice retention and reducing the workload on your cooling system.
Optimizing airflow inside the cooler is important for even cooling. By organizing items thoughtfully, you allow cold air to circulate freely, preventing hotspots and ensuring that all contents remain adequately chilled.
What Common Mistakes Should Be Avoided When Building a Homemade Cooler?
When building a homemade cooler, several common mistakes can hinder its effectiveness and efficiency.
- Using Inadequate Insulation: Many homemade coolers fail to provide sufficient insulation, which is crucial for maintaining low temperatures. Materials such as foam board or thick fiberglass are ideal; using thinner or less effective materials can lead to rapid temperature loss.
- Neglecting to Seal Properly: A common oversight is failing to properly seal joints and seams, which can allow warm air to enter and cool air to escape. Using high-quality sealants and ensuring that lids fit snugly can help prevent this issue, maximizing the cooler’s efficiency.
- Ignoring Drainage Options: Some builders forget to incorporate a drainage system, resulting in accumulation of water inside the cooler. Including a spout or valve at the bottom allows for easy removal of melted ice and helps maintain a clean environment inside the cooler.
- Choosing the Wrong Size: Selecting the wrong size for your cooler can lead to wasted space or insufficient capacity for your needs. It’s important to consider the amount of items you plan to store; a cooler that’s too small will be ineffective, while an overly large one may not retain cold as efficiently.
- Overloading with Ice: While it might seem logical to pack as much ice as possible, overloading can reduce airflow and insulation effectiveness. It’s better to balance the amount of ice with the items being stored, allowing for better cooling circulation.
- Failing to Test Before Use: Skipping a test run before taking your cooler on a trip can lead to surprises when it fails to perform as expected. Conducting a test with ice and items can help identify any issues with insulation or sealing before it’s needed for a more important occasion.