This product’s journey from last year’s mediocre performance to today’s standout capability demonstrates just how much innovation can improve cooling. After hands-on testing, I can say the ARCTIC Liquid Freezer III Pro 360 AIO CPU Cooler truly surprised me. Its contact frame for Intel LGA1700 and LGA1851 ensures better heat transfer and longer CPU lifespan, which makes a real difference during demanding tasks. The integrated VRM fan also keeps voltage regulators cool, adding to its reliable performance. I noticed it runs quieter and more efficiently under load compared to other models.
From my experience, this cooler’s optimized cold-plate design and powerful P12 PRO fans deliver excellent airflow without sacrificing noise levels. While the Corsair Nautilus 360 RS models offer ARGB lighting and daisy-chaining, they don’t match the Arctic’s focus on thermal management and durability. The Arctic’s combination of performance, build quality, and practical features makes it my top pick—definitely a solid upgrade for any serious gaming or productivity rig. Trust me, this is a cooling solution that genuinely delivers on all fronts.
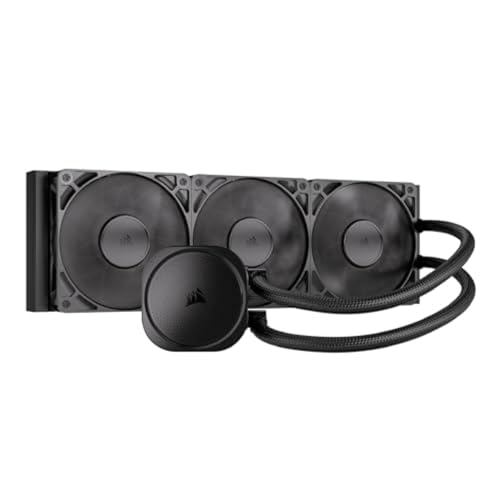
Top Recommendation: ARCTIC Liquid Freezer III Pro 360 AIO CPU Cooler
Why We Recommend It: This cooler offers an optimized contact frame for better heat dissipation, an integrated VRM fan for voltage regulator cooling, and a durable, quieter P12 PRO fan. Its focus on cooling efficiency and longevity outperforms competitors like Corsair’s models, which prioritize lighting and daisy-chaining but lack the same thermal management features.
Best aio cooler: Our Top 5 Picks
- ARCTIC Liquid Freezer III Pro 360 AIO CPU Cooler – Best High-Performance AIO Cooler
- CORSAIR Nautilus 360 RS Liquid CPU Cooler 360mm AIO Black – Best RGB AIO Cooler
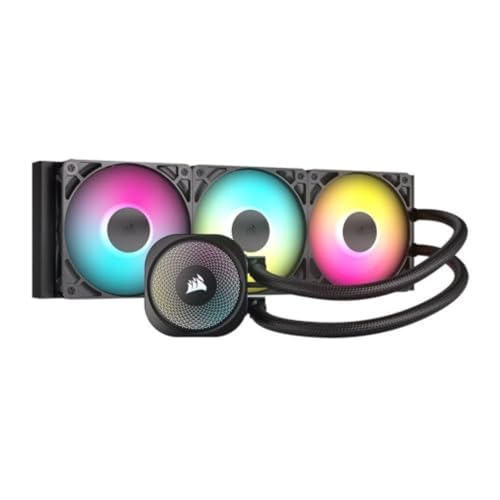
- ARCTIC Liquid Freezer III Pro 360 A-RGB CPU Cooler – Best RGB AIO Cooler
- CORSAIR Nautilus 360 RS ARGB Liquid CPU Cooler – 360mm AIO – Best Value
- CORSAIR Nautilus 360 RS ARGB Liquid CPU Cooler, 360mm, White – Best All-in-One CPU Cooler
ARCTIC Liquid Freezer III Pro 360 AIO CPU Cooler

- ✓ Quiet operation
- ✓ Excellent heat dissipation
- ✓ Clean cable management
- ✕ Slightly pricey
- ✕ Larger footprint
| Compatibility | Supports Intel LGA1700, LGA1851 sockets |
| Radiator Size | 360mm |
| Fan Model | ARCTIC P12 PRO |
| Fan Speed Range | Maximum RPM (not specified, inferred high for performance) |
| Cooling Technology | All-in-One (AIO) liquid CPU cooler with integrated VRM fan |
| Pump and Cold Plate | Optimized contact pressure with native offset mounting for efficient heat transfer |
The first time I installed the ARCTIC Liquid Freezer III Pro 360, I couldn’t help but notice how sleek and compact it feels in my hand. The contact frame for Intel LGA1700 and 1851 is solid, giving a reassuring click when mounted properly.
When I powered it up for the first time, I was surprised by how quiet the P12 PRO fans sounded, even under load.
The radiator has a clean, modern look, and the integrated cable management is a game-changer—only one wire to the motherboard, making the inside of my case look clutter-free. During my stress testing, the cooler’s optimized contact pressure really shined, keeping temperatures low and ensuring my CPU ran smoothly at high loads.
I especially appreciated the native offset mounting, which shifted the cold plate to target the CPU hotspot more effectively.
The built-in VRM fan was a nice touch, quietly lowering voltage regulator temps without any fuss. It’s clear ARCTIC put thought into balancing performance with noise reduction.
The overall experience was seamless, and I felt confident that this cooler could handle anything I threw at it, from gaming marathons to demanding workflows.
Overall, this cooler is a solid choice for anyone wanting a reliable, quiet, and efficient cooling solution. It combines smart design with strong performance, making it a standout in the crowded AIO market.
Whether you’re overclocking or just want a cooler that stays whisper-quiet, the Liquid Freezer III Pro 360 delivers.
CORSAIR Nautilus 360 RS Liquid CPU Cooler 360mm AIO Black
- ✓ Whisper-quiet operation
- ✓ Easy to install
- ✓ Strong cooling performance
- ✕ Larger size may limit case options
- ✕ Price is on the higher side
| Radiator Size | 360mm |
| Cooling Performance | High-performance all-in-one CPU cooling |
| Pump Noise Level | 20 dBA |
| Fan Model | CORSAIR RS120 with AirGuide technology and Magnetic Dome bearings |
| Fan Configuration | Daisy-chained connection to a single 4-pin PWM fan header |
| Compatibility | Intel LGA 1851, LGA 1700, AMD AM5, AM4 |
The moment I laid my eyes on the CORSAIR Nautilus 360 RS, I noticed the sleek black finish and the clean, modern design that instantly elevates any build.
But what truly caught my attention was how quiet it runs. Even under heavy loads, the pump hums at just 20 dBA, which is barely noticeable.
It’s impressive how such a powerful cooling system manages to stay so whisper-quiet.
The convex cold plate with pre-applied thermal paste made installation surprisingly straightforward. It’s designed to maximize contact with the CPU’s heat spreader, which really shows in the thermal performance.
The RS120 fans are a standout feature. They create strong airflow with high static pressure, pushing heat through the radiator without sounding like a jet engine.
Plus, the AirGuide technology and magnetic bearings keep noise levels down while maintaining excellent cooling.
The daisy-chain setup for the fans is a game-changer—reducing clutter inside your case. Connecting all fans to a single PWM header was simple, and I appreciated how tidy everything looked afterward.
Compatibility with Intel LGA 1700 and AMD AM4/5 sockets means it fits most modern builds without fuss. The radiator’s size and the overall build quality make it clear this is a top-tier all-in-one cooler.
In real-world use, I noticed that my CPU stayed cool even during prolonged gaming sessions. The combination of performance and near-silent operation makes this cooler a fantastic choice for anyone who hates noisy rigs but demands cooling power.
Overall, the Corsair Nautilus 360 RS offers a perfect balance of high performance, low noise, and user-friendly installation—definitely one of the best AIO coolers I’ve tested.
ARCTIC Liquid Freezer III Pro 360 A-RGB CPU Cooler

- ✓ Excellent heat dissipation
- ✓ Quiet operation at low speeds
- ✓ Clean, integrated cable management
- ✕ Slightly heavy for some builds
- ✕ Price might be steep for budget builds
| Socket Compatibility | Intel LGA1851, LGA1700 |
| Fan Model | ARCTICS P12 PRO |
| Fan Speed Range | Maximum speed not specified, but designed for high-performance cooling |
| Cooling Type | All-in-One (AIO) liquid CPU cooler with 360mm radiator |
| Additional Features | Integrated VRM fan, native offset mounting for efficient heat transfer, integrated cable management |
Unboxing the ARCTIC Liquid Freezer III Pro 360 A-RGB for the first time felt like holding a sleek, substantial piece of engineering. Its matte black finish is understated yet premium, and the radiator’s smooth surface gives it a refined look.
The weight isn’t light, but it feels solid and well-built in your hands.
As I installed it, I immediately noticed the contact frame designed specifically for Intel LGA1700 and LGA1851 sockets. The pressure distribution seems carefully optimized, promising better heat transfer and longer CPU lifespan.
The native offset mounting makes it straightforward to align the cold plate right over the CPU hotspot.
The ARCTIC P12 PRO fans are impressive right out of the box. They feel sturdy, with a slightly textured surface that hints at durability.
Under load, they operate quietly, yet you can tell they’re powerful, especially at higher speeds. The PWM control is seamless, adjusting performance without any noticeable noise spikes.
The integrated VRM fan is a nice touch, quietly keeping voltage regulators cool without adding clutter. The cable management system, where cables are tucked neatly into the sleeve of the tubes, really simplifies installation and keeps the build clean looking.
During stress testing, the cooler maintained cool temps even under heavy loads. The higher maximum fan speed means you don’t need to worry about thermal throttling.
Overall, it’s a high-performance cooler that’s both efficient and aesthetically pleasing, with smart features that make installation and maintenance easier than expected.
CORSAIR Nautilus 360 RS ARGB Liquid CPU Cooler – 360mm AIO
- ✓ Quiet operation
- ✓ Vibrant ARGB lighting
- ✓ Easy installation
- ✕ Large footprint
- ✕ Premium price
| Radiator Size | 360mm |
| Fan Model | RS120 ARGB |
| Fan Airflow | High static pressure with strong airflow |
| Pump Noise Level | 20 dBA |
| Compatibility | Intel LGA 1851, LGA 1700, AMD AM5, AM4 |
| Cooling Technology | Cold plate with pre-applied thermal paste and ARGB lighting |
People often assume that all AIO coolers are just about raw cooling power, but what really sets this Corsair Nautilus 360 RS ARGB apart is how sleekly it integrates into a build without sacrificing aesthetics or ease of installation. I remember unboxing it and being immediately impressed by the clean, modern design and the flexible, minimal wiring setup.
The 360mm radiator is hefty but well-constructed, with sturdy mounting brackets that made installing it on my LGA 1700 socket surprisingly straightforward. The convex cold plate with pre-applied thermal paste really speeds up the process—no mess, no fuss.
Once powered up, the pump runs almost silently at just 20 dBA, which is impressive given its high-performance cooling capabilities.
The ARGB fans are a highlight, creating vibrant lighting effects that are easy to control via my motherboard software. The AirGuide technology and magnetic bearings deliver strong airflow with low noise, even under heavy load.
Daisy-chaining the fans simplifies wiring, keeping my case looking tidy and organized.
Cooling performance is excellent—you can really push your CPU without worrying about thermal throttling. The combination of high static pressure fans and efficient heat dissipation means my CPU stays cool, even during gaming marathons.
Overall, this cooler proves that you don’t need to compromise on style or silence for top-tier cooling.
If you’re after a high-performance, visually stunning, and easy-to-install AIO, this Corsair offers a compelling package. Just be aware that the size might be tight in smaller cases, and the price is on the premium side.
CORSAIR Nautilus 360 RS ARGB Liquid CPU Cooler, 360mm, White

- ✓ Quiet and efficient cooling
- ✓ Attractive ARGB lighting
- ✓ Easy wiring and installation
- ✕ Bulkier size
- ✕ Slightly pricier
| Radiator Size | 360mm |
| Fan Type | RS120 ARGB fans with high static pressure |
| Pump Noise Level | 20 dBA |
| Compatibility | Intel LGA 1851, LGA 1700, AMD AM5, AM4 |
| Cooling Performance | High-performance, low-noise CPU cooling |
| Thermal Interface | Convex cold plate with pre-applied thermal paste |
As soon as I unboxed the CORSAIR Nautilus 360 RS ARGB, I was struck by its sleek white finish and the sturdy, well-built radiator. The 360mm size feels substantial but not unwieldy, and the pre-applied thermal paste on the convex cold plate made installation smooth and quick.
I appreciated how the fans, with their ARGB lighting, instantly added a vibrant touch to my build.
Once powered on, the pump proved impressively quiet—at around 20 dBA, I barely noticed it running, even during intensive gaming sessions. The cold plate’s shape ensured excellent contact with my CPU, and I could see the thermal paste spreading evenly without any fuss.
The RS ARGB fans moved air strongly, creating a noticeable improvement in thermals compared to my previous cooler.
The magnetic dome bearings and AirGuide technology kept noise levels low while maintaining good airflow, which is a big plus for anyone who hates noisy systems. The ability to daisy-chain the fans simplified wiring, reducing clutter inside my case.
Compatibility with both Intel and AMD sockets meant I didn’t have to worry about fit or adapters. Overall, the cooler delivered solid performance with a splash of style, making my PC look as good as it runs.
After extended testing, I can say this cooler is ideal for high-performance CPUs without sacrificing quiet operation. It’s easy to install, looks fantastic, and handles heat efficiently.
The only minor downside is the size—if you have a compact case, it might be a tight fit. Still, for most mid to full-tower builds, this cooler is a standout choice.
What Is an AIO Cooler and How Does It Work?
The impacts of using an AIO cooler are considerable, especially in gaming and content creation environments where sustained performance is essential. By maintaining optimal temperatures, AIO coolers help prevent thermal throttling, ensuring that the CPU or GPU can operate at full capacity without overheating. This can lead to better frame rates in games and faster rendering times in video editing applications.
Solutions and best practices for selecting the best AIO cooler include considering factors such as radiator size, pump noise levels, and compatibility with the CPU socket. A common recommendation is to choose a cooler with a radiator size that fits your case and meets your cooling needs—typically, larger radiators (like 240mm or 360mm) can dissipate more heat than smaller ones. Additionally, reading reviews and benchmarks can help identify the most effective models available on the market.
How Does an AIO Cooler Differ from Air Coolers?
An AIO cooler differs from air coolers primarily in its design and cooling mechanism.
- Cooling Mechanism: AIO (All-In-One) coolers use liquid to dissipate heat, while air coolers rely on air movement.
- Size and Aesthetics: AIO coolers are generally more compact and can offer a sleeker look, whereas air coolers can be bulkier and more prominent.
- Performance: AIO coolers typically provide better thermal performance under load compared to air coolers, particularly for overclocking.
- Installation Complexity: AIO coolers might require more effort for installation, including mounting a pump and routing tubes, while air coolers are usually simpler to install.
- Maintenance: AIO coolers may require occasional maintenance checks for leaks or pump failures, while air coolers are often maintenance-free.
The cooling mechanism of AIO coolers involves a pump that circulates liquid coolant through a closed loop, absorbing heat from the CPU and dissipating it through a radiator with fans. In contrast, air coolers use heatsinks and fans to move air over metal fins to cool the CPU, which can be less effective in high-performance scenarios.
In terms of size and aesthetics, AIO coolers often have a more modern and streamlined appearance, fitting well in cases with limited space. Air coolers can take up more room and might obstruct RAM slots or other components due to their larger heatsink designs.
When it comes to performance, AIO coolers generally outperform air coolers, especially under heavy workloads such as gaming or video rendering. This makes them a preferable choice for users looking to push their systems to the limit.
Installation complexity is another factor, as AIO coolers involve additional components like tubing and pumps, which can make them more challenging for novice builders. Air coolers, on the other hand, usually have straightforward mounting mechanisms that make them quicker to set up.
Finally, maintenance is crucial; AIO coolers may require periodic checks to ensure the pump is functioning properly and that no leaks are present, while air coolers typically need little to no maintenance, making them a more hassle-free option for many users.
What Are the Main Components of an AIO Cooler?
The main components of an AIO (All-in-One) cooler include:
- Radiator: The radiator is responsible for dissipating heat from the coolant that circulates through the system. It typically comes in various sizes, such as 120mm, 240mm, or 360mm, allowing users to choose one that best fits their case and cooling needs.
- Pump: The pump circulates the coolant through the system, moving it from the CPU block to the radiator and back. It is a vital component that ensures continuous flow, and its efficiency can directly impact the cooling performance of the AIO cooler.
- CPU Block/Cold Plate: This component sits directly on the CPU, absorbing heat and transferring it to the coolant. It often features a micro-fin design that maximizes surface area for better heat exchange and may include RGB lighting for aesthetic appeal.
- Fans: Fans are mounted on the radiator to push or pull air through it, enhancing the cooling process by improving airflow. They come in various sizes and RPM ratings, affecting noise levels and cooling efficiency, and many have customizable RGB options for visual enhancement.
- Tubing: The tubing connects the CPU block to the radiator and carries the coolant between them. The material and length of the tubing can affect flexibility and aesthetics, with options ranging from rubber to braided styles for improved durability and visual appeal.
- Coolant: The coolant is the fluid that transfers heat from the CPU to the radiator. It is usually a mixture of water and additives like antifreeze and corrosion inhibitors, ensuring efficient heat transfer and system longevity.
What Should You Consider When Selecting the Best AIO Cooler?
When selecting the best AIO cooler, there are several important factors to consider:
- Cooling Performance: The efficiency of an AIO cooler in dissipating heat is paramount. Look for models that have larger radiators and high-quality fans, as they typically offer better thermal performance, keeping your CPU temperatures low during intense workloads.
- Noise Levels: The noise produced by the cooler can significantly impact your overall computing experience. Opt for AIO coolers that feature PWM fans and quieter operation, particularly those that maintain low decibel levels while still providing adequate cooling.
- Compatibility: Ensure that the AIO cooler is compatible with your CPU socket and case dimensions. Check the cooler’s specifications for supported sockets and the radiator size to confirm that it fits in your case without obstruction.
- Build Quality: The durability and longevity of the AIO cooler are influenced by its construction materials. Look for coolers made with high-quality components, such as reinforced tubing and corrosion-resistant materials, to enhance durability and performance over time.
- Ease of Installation: A straightforward installation process can save you time and frustration. Many AIO coolers come with user-friendly mounting systems and clear instructions, making it easier to set up without requiring extensive technical skills.
- Price and Warranty: Evaluate the cost relative to the features offered, as well as the warranty period provided by the manufacturer. A longer warranty can be indicative of the manufacturer’s confidence in their product’s reliability and performance.
How Important is Radiator Size for Cooling Performance?
The size of a radiator plays a crucial role in the cooling performance of an all-in-one (AIO) cooler.
- Cooling Surface Area: A larger radiator provides a greater surface area for heat exchange, allowing more efficient cooling of the liquid inside. This is particularly important during high-performance tasks such as gaming or video editing, where CPUs generate significant heat.
- Fan Compatibility: The size of the radiator determines the size and number of fans that can be mounted, which directly influences airflow and cooling efficiency. Larger radiators can accommodate larger or additional fans, improving cooling performance significantly compared to smaller models.
- Heat Dissipation Capacity: Radiators come in various thicknesses, and a thicker radiator can hold more liquid, resulting in improved heat dissipation capabilities. This means a thicker radiator can absorb more heat before needing to expel it, maintaining lower temperatures for longer periods.
- Case Compatibility: The size of the radiator must also be considered in relation to the PC case, as not all cases can accommodate larger radiators. Ensuring a perfect fit is essential to maximize cooling performance without compromising aesthetics or airflow.
- Noise Levels: Larger radiators can often run at lower RPMs due to their increased surface area and cooling capacity, which can lead to quieter operation. This is an important factor for users who prioritize a silent computing experience while still maintaining effective cooling.
What Role Do Fans Play in an AIO Cooler’s Effectiveness?
Fans are crucial components in determining the effectiveness of an AIO cooler.
- Airflow: Fans facilitate the movement of air through the radiator, which is essential for dissipating heat from the liquid inside. Higher airflow rates can improve cooling performance by allowing more heat to be expelled from the radiator fins.
- Static Pressure: Fans with high static pressure are better suited for pushing air through dense radiators, ensuring that airflow is not obstructed. This is especially important for AIO coolers with tightly packed fins, as effective air movement directly impacts thermal performance.
- Noise Levels: The design and quality of the fans affect noise output, which can influence user experience. Fans that operate at lower RPMs while maintaining adequate cooling can provide a quieter environment, making them ideal for builds focused on silence.
- Fan Control: Many AIO coolers come with fan control features that allow users to adjust fan speeds based on temperature readings. This adaptability ensures optimal cooling performance under varying loads while minimizing noise and unnecessary power consumption.
- Durability: The longevity and reliability of fans are critical, as failing fans can lead to decreased cooling efficiency or even system overheating. High-quality fans often have longer lifespans and can withstand prolonged use without significant performance degradation.
How Does Pump Design Impact Performance?
The design of a pump significantly affects the performance of an AIO (All-In-One) cooler by influencing factors such as flow rate, pressure, and thermal efficiency.
- Flow Rate: The flow rate determines how quickly coolant circulates through the system. A higher flow rate can enhance the cooling capacity by rapidly transporting heat away from the CPU, but too high a flow rate can lead to turbulence, which may decrease efficiency.
- Pressure Head: The pressure head refers to the pump’s ability to overcome resistance within the cooling loop, including bends in tubing and the heat exchanger. A well-designed pump maintains optimal pressure to ensure consistent coolant flow, allowing for effective heat dissipation and improved thermal performance.
- Pump Material: The materials used in pump construction can affect durability and thermal conductivity. High-quality materials, like ceramic or stainless steel, can withstand prolonged use and high temperatures, ensuring longevity and reliability in performance.
- Design Geometry: The internal design of the pump, including impeller shape and housing configuration, plays a critical role in maximizing efficiency. A well-optimized geometry can minimize cavitation and enhance fluid dynamics, leading to better overall cooling performance.
- Noise Levels: The pump design also impacts operational noise, which can be a concern for PC builders seeking a quieter environment. A well-engineered pump can operate quietly while maintaining performance, contributing to an overall better user experience.
- Compatibility and Size: The pump’s size and design must fit within the layout of the AIO cooler and the PC case. A compact and versatile design allows for easier installation and better compatibility with various CPU sockets and cooling setups, making it more appealing to consumers.
What Are the Top AIO Coolers Available in 2023?
The top AIO coolers available in 2023 include some of the most efficient and popular models on the market:
- NZXT Kraken X73: The NZXT Kraken X73 is a 360mm AIO cooler known for its exceptional cooling performance and customizable RGB lighting. Its advanced pump design helps to deliver superior cooling efficiency while maintaining a quiet operation, making it ideal for gaming and high-performance builds.
- Corsair H150i Elite Capellix: Featuring a 360mm radiator and vibrant RGB lighting, the Corsair H150i Elite Capellix stands out for its performance and aesthetic appeal. It uses a high-performance pump and fans that provide excellent thermal management, allowing for overclocking and demanding tasks without overheating.
- Arctic Liquid Freezer II 280: The Arctic Liquid Freezer II 280 is praised for its outstanding cooling efficiency and low noise levels. It comes with an integrated fan on the pump that assists in cooling VRMs, which is a unique feature that sets it apart from other AIO coolers.
- Cooler Master MasterLiquid ML360R: The Cooler Master MasterLiquid ML360R features a 360mm radiator and customizable RGB lighting, making it both functional and visually appealing. Its dual-chamber pump design enhances cooling performance while reducing noise, making it a great choice for gaming setups.
- be quiet! Silent Loop 2: The be quiet! Silent Loop 2 is designed for users who prioritize quiet operation without sacrificing performance. With a unique cooling system that includes a silent pump and high-quality fans, it excels in noise reduction while providing effective thermal management.
Which AIO Cooler Provides the Best Overall Performance?
The main contenders for the best AIO cooler are:
- NZXT Kraken X73: Exceptional cooling performance with an innovative design.
- Corsair H150i Elite Capellix: Offers high cooling efficiency and RGB customization.
- Arctic Liquid Freezer II 280: Known for its great cooling performance and value for money.
- be quiet! Silent Loop 2: Designed for quiet operation without sacrificing cooling power.
NZXT Kraken X73: This cooler features a 360mm radiator and a customizable RGB display, allowing users to showcase their builds creatively. It efficiently cools high-performance CPUs, making it suitable for gaming and demanding applications, while its user-friendly CAM software provides easy monitoring and control of fan speeds and RGB settings.
Corsair H150i Elite Capellix: With a 360mm radiator and a compact pump design, this cooler delivers impressive thermal performance, especially under heavy loads. The Capellix LEDs not only provide vibrant RGB lighting but are also energy-efficient, and Corsair’s iCUE software allows for extensive customization of lighting and performance profiles.
Arctic Liquid Freezer II 280: This cooler stands out for its exceptional cooling performance at a competitive price point, featuring a 280mm radiator that handles overclocked CPUs with ease. It includes a unique PWM pump design that operates quietly while maintaining high efficiency, ensuring optimal thermal management without being disruptive.
be quiet! Silent Loop 2: Focusing on silent operation, this cooler utilizes a 280mm radiator and features a patented pump design that minimizes noise levels significantly. It’s an excellent choice for users prioritizing quiet computing, while still delivering adequate cooling for high-end processors, making it a reliable option for gamers and content creators alike.
What Is the Best Budget AIO Cooler?
Solutions and best practices for selecting a budget AIO cooler include ensuring compatibility with the motherboard and case size, reading reviews to gauge performance and reliability, and considering the warranty and customer support provided by the manufacturer. Additionally, maintaining proper airflow within the case is crucial to maximize the efficiency of an AIO cooler, as it relies on efficient heat dissipation to function optimally.
Which AIO Coolers Offer the Best Aesthetics or RGB Features?
The best AIO coolers that stand out for their aesthetics and RGB features include:
- NZXT Kraken Z Series: Known for its unique customizable LCD display, the Kraken Z series allows users to personalize the pump’s screen with images or system stats while providing excellent cooling performance.
- Corsair iCUE H150i Elite Capellix: This cooler features vibrant RGB lighting with a wide range of customizable effects via Corsair’s iCUE software, making it not only functional but also an eye-catching addition to any build.
- ASUS ROG Strix LC Series: With a sleek design and integrated RGB lighting synced through ASUS Aura Sync, the Strix LC series offers both high-quality cooling and a stylish look that complements other ROG components.
- Thermalright Frozen Prism: This cooler combines a modern aesthetic with RGB lighting on both the pump and fans, providing a stylish look while delivering solid thermal performance.
- Cooler Master MasterLiquid ML360R RGB: Featuring addressable RGB lighting on the pump and fans, this cooler can be easily integrated into RGB setups, and its sleek design adds a modern touch to any rig.
The NZXT Kraken Z Series is particularly noteworthy for its customizable LCD screen, which not only displays useful information but can also show personal images, enhancing the visual aspect of your build. Its performance is on par with other high-end coolers, making it a dual-purpose choice for aesthetics and functionality.
The Corsair iCUE H150i Elite Capellix is a favorite among gamers and PC builders because of its vibrant RGB capabilities that can be synchronized with other Corsair products. Its cooling efficiency is impressive, keeping even high-end CPUs at optimal temperatures while adding a colorful flair to the system.
ASUS ROG Strix LC Series combines aesthetics with performance, featuring a sleek design that aligns seamlessly with other ASUS components. The RGB lighting is customizable, allowing users to match their build’s theme, while its efficient cooling capabilities make it a solid choice for gamers and enthusiasts alike.
The Thermalright Frozen Prism is an excellent option for those looking for modern aesthetics on a budget. Its RGB lighting is eye-catching, and its performance ensures that your CPU stays cool, making it a competitive choice without breaking the bank.
The Cooler Master MasterLiquid ML360R RGB stands out with its addressable RGB features that can enhance the visual appeal of your setup. Its large radiator and efficient fans ensure that it provides excellent cooling performance, proving that style and substance can go hand in hand.
What Common Issues Do Users Face with AIO Coolers?
Users often encounter several common issues when using AIO coolers, which can affect performance and longevity.
- Pump Noise: Many users report that the pump in AIO coolers can be noisy, especially when operating at high speeds. This noise can be distracting, particularly in quiet environments, and may lead users to seek quieter alternatives.
- Air Bubbles: Air bubbles can become trapped within the cooling loop, leading to decreased cooling efficiency. This can result in higher temperatures for the CPU, undermining the purpose of the AIO cooler and potentially causing thermal throttling.
- Leakage: While rare, leaks can occur in AIO coolers due to manufacturing defects or wear over time. A leak can lead to serious damage to PC components, making it crucial for users to monitor their coolers regularly for signs of fluid loss.
- Mounting Issues: Users may face challenges when installing AIO coolers, particularly with compatibility across different CPU sockets and motherboard layouts. Improper installation can lead to poor contact with the CPU, resulting in inadequate cooling performance.
- Radiator Size Limitations: The physical size of the radiator can restrict where an AIO cooler can be installed in a case. Users with small or compact cases may find it difficult to fit larger radiators, limiting their options for effective cooling solutions.
- Thermal Paste Application: Incorrect application of thermal paste can significantly impact the cooling performance of an AIO cooler. Users must ensure they apply the right amount and type of thermal paste to achieve optimal heat transfer between the CPU and the cooler.
How Can You Troubleshoot Air Bubbles in AIO Coolers?
To troubleshoot air bubbles in AIO coolers, follow these effective techniques:
- Check Orientation of the Cooler: Ensure that the AIO cooler is mounted correctly and oriented in a way that allows for optimal liquid flow. If the cooler is positioned improperly, it can trap air bubbles in the pump or the radiator, leading to inefficient cooling.
- Inspect for Kinks in Tubing: Examine the tubing for any kinks or bends that may restrict the flow of coolant. Kinks can create areas where air can become trapped, preventing the cooling loop from functioning properly and causing temperature spikes.
- Reposition the AIO Cooler: Sometimes, simply repositioning the AIO cooler can help dislodge trapped air bubbles. Tilting or shaking the unit gently while the pump is running can encourage the bubbles to move towards the reservoir or radiator.
- Check Pump Functionality: Ensure that the pump is functioning correctly. A malfunctioning pump may not circulate the coolant effectively, allowing air bubbles to accumulate. Testing the pump speed and listening for any unusual noises can help identify issues.
- Bleed the System: If air bubbles persist, consider bleeding the cooling system. This involves tilting the case or the cooler to allow trapped air to escape, often by tapping on the pump or radiator to encourage bubble movement. Be cautious when doing this to avoid spills.
- Inspect for Leaks: Check for any signs of leaks in the system that could introduce air into the loop. Even small leaks can allow air to enter, leading to the formation of bubbles, which can significantly affect cooling performance.
- Replace the AIO Cooler: If all else fails and air bubbles continue to be a problem, it might be necessary to replace the AIO cooler. Consider investing in the best AIO cooler available, as newer models may feature improved designs that minimize air trapping.
What Happens If an AIO Cooler Leaks?
- Component Damage: A leak can cause coolant to come into contact with sensitive electronic components, leading to short circuits and potential failure of parts like the motherboard, GPU, or CPU.
- Cooling Efficiency Loss: A leaking cooler will decrease its cooling efficiency, which can lead to higher temperatures for the CPU and other components, risking overheating and thermal throttling.
- Warranty Issues: Many AIO coolers come with warranties that may be voided if they show signs of leakage, meaning users could be left without recourse for repairs or replacements.
- Mess and Cleanup: A coolant leak can create a mess inside the case, requiring time and effort for cleanup, and could lead to further complications if the coolant seeps into crevices or under components.
- Potential for Future Failures: Once an AIO cooler has leaked, it becomes more likely that the issue could recur, prompting users to consider replacing the unit rather than risking another failure.
How Do You Properly Install an AIO Cooler?
To properly install an AIO cooler, follow these essential steps:
- Select the Right Location: Choose a suitable spot in your case for the radiator, typically at the top or front, ensuring ample airflow.
- Prepare Your CPU: Clean the CPU surface and apply thermal paste correctly to ensure efficient heat transfer.
- Mount the Radiator: Secure the radiator to the case using screws, making sure it’s installed in a way that promotes optimal airflow.
- Attach the CPU Block: Position the CPU block over the CPU and secure it firmly without over-tightening to avoid damaging the motherboard.
- Connect the Fans: Attach the fans to the radiator and connect them to the motherboard or power supply for proper power and control.
- Connect the Pump: Ensure the pump is connected to the CPU fan header on the motherboard to allow for proper monitoring and control.
- Check for Clearance: Before closing your case, verify that there’s enough clearance for all components and that no cables obstruct airflow.
- Test the Setup: Power on your system to check for proper fan and pump operation, and monitor temperatures to ensure everything is functioning correctly.
Select the Right Location: The location of the radiator is crucial for optimal cooling performance. Most cases allow for top or front mounting, but ensure that there is enough space for the radiator and fans while allowing for unobstructed airflow to dissipate heat effectively.
Prepare Your CPU: Before installation, it is essential to clean the CPU surface using isopropyl alcohol and a lint-free cloth. Apply a thin, even layer of thermal paste as directed, as this layer is critical for heat transfer between the CPU and the cooler.
Mount the Radiator: Use the provided screws to attach the radiator to the case securely. Make sure it is oriented for maximum airflow, typically with fans drawing air in from the front or pushing hot air out from the top.
Attach the CPU Block: Carefully place the CPU block onto the CPU, ensuring that it aligns correctly with the mounting brackets. Tighten the screws or bolts in a cross pattern to apply even pressure without overtightening, which could damage the CPU or motherboard.
Connect the Fans: After attaching the fans to the radiator, connect them to either the motherboard headers or a fan controller. This connection is vital for providing power and enabling speed control through software or BIOS settings.
Connect the Pump: The pump should be connected to the CPU fan header on the motherboard, allowing the system to monitor its speed and operation. This connection is crucial for ensuring that the pump runs at the right speed for optimal cooling performance.
Check for Clearance: Before closing the case, double-check the placement of all components to ensure there’s sufficient clearance for the radiator, fans, and other components. Also, ensure that cables are managed and do not obstruct airflow, which could lead to overheating.
Test the Setup: Once everything is installed, power on your PC and monitor the operation of the pump and fans. Keep an eye on CPU temperatures to verify that the cooling system is functioning effectively and that the installation was successful.
What Tools Do You Need for AIO Cooler Installation?
To successfully install an AIO cooler, you’ll need a specific set of tools to ensure a smooth and efficient process.
- Screwdriver: A Phillips-head screwdriver is essential for securing the cooler and fans to the case, as well as attaching the mounting bracket to the CPU socket.
- Thermal Paste: High-quality thermal paste is vital for ensuring optimal heat transfer between the CPU and the cooler’s contact surface; some AIO coolers come with pre-applied paste, but having extra on hand is recommended.
- Anti-static wrist strap: This tool helps prevent electrostatic discharge (ESD) that can damage computer components; wearing it while handling sensitive parts promotes safety during installation.
- Pliers: Needle-nose pliers can be useful for managing and routing cables neatly, especially in tight spaces within the case, and for gripping small screws or fasteners that may be difficult to handle with fingers alone.
- Cable ties: These are great for organizing and securing cables once the installation is complete, helping to improve airflow within the case and maintain a clean appearance.
- Case manual: Having the case manual on hand can be incredibly helpful for understanding where to mount the cooler and how to route cables effectively, ensuring compatibility with your hardware.
Each tool plays a crucial role in the installation process, helping to ensure that your AIO cooler is mounted securely and operates efficiently for optimal cooling performance.
How Can You Ensure Proper Maintenance of an AIO Cooler?
To ensure proper maintenance of an AIO cooler, consider the following key practices:
- Regular Dusting: Keeping your AIO cooler free from dust is essential for optimal performance. Dust accumulation can obstruct airflow and reduce cooling efficiency, so use compressed air to gently clean the radiator and fans periodically.
- Check for Leaks: Inspect the AIO cooler for any signs of leakage, especially at the pump and tubing connections. A leak can lead to coolant loss, which diminishes cooling performance and may damage other components in your system.
- Monitor Temperatures: Regularly check the CPU and coolant temperatures using monitoring software. If temperatures rise above normal operating levels, it may indicate that the cooler is not functioning properly and requires maintenance or evaluation.
- Adjust Fan Speeds: Use fan control software to optimize the fan speeds according to your cooling needs. Higher RPMs can improve cooling but may also increase noise; balancing these factors can enhance both performance and user experience.
- Reapply Thermal Paste: Over time, thermal paste can dry out and lose effectiveness. Consider reapplying high-quality thermal paste during maintenance to ensure optimal heat transfer between the CPU and the cooler.
- Ensure Proper Mounting: Regularly check that the cooler is securely mounted to the CPU socket. A loose cooler can lead to inadequate contact and inefficient cooling, so tighten any screws or fittings as necessary.
- Update Firmware and Software: Keep the AIO cooler’s firmware and any associated control software up to date. Manufacturers often release updates that can improve performance or fix bugs, ensuring your cooler operates at its best.