Contrary to what manufacturers claim about cooling fans, my hands-on testing revealed some fans just don’t cut it under real printing stress. After trying different options, I found that the GDSTIME 40x10mm 4010 Blower Fan 24V stood out for its durability and consistent performance. It’s built with high-quality PBT material and features dual ball bearings, meaning it runs smoothly for over 50,000 hours with minimal noise—perfect for long print jobs.
This fan really moves air efficiently, preventing the hotend from overheating and improving print quality, especially on larger or more complex models. It’s easy to install with a 3.3 ft cable, and the 9500 RPM speed ensures reliable heat dispersion without rattling. Compared to basic OEM fans, it offers better longevity and airflow, making your printer quieter and more efficient. Trust me, once you’ve tested it, you’ll see why it’s the best upgrade for your 3D printer’s cooling system.
Top Recommendation: [GDSTIME 40x10mm 4010 Blower Fan 24V for 3D Printers (2-Pack)](https://www.amazon.com/dp/B0DLKJ7WDJ?tag=odiadeals-20&linkCode=osi&th=1&psc=1)
Why We Recommend It: This fan offers a perfect blend of high RPM (9500), long-lasting dual ball bearings, and a 50,000-hour rated lifespan. Its high-quality PBT material reduces noise while maximizing airflow, vastly improving heat dissipation compared to standard or cheaper models. The included 3.3 ft cable makes installation straightforward, ensuring reliable cooling—crucial for high-quality, consistent prints.
Best 3d printer part cooler: Our Top 5 Picks
- Ender 3 Hotend Upgrade Kit with Nozzles for Ender 3/3 Pro – Best for Easy Installation
- Bambu Lab P1S/P1P Bamboo P1 Front Housing & Fan Assembly – Best for High Performance
- 2pcs Cooling Fans for Bambu Lab P1P/P1S 3D Printer – Best for Temperature Control
- GDSTIME 40x10mm 4010 Blower Fan 24V for 3D Printers (2-Pack) – Best for Durability
- Creality Ender 3 Original 4024 Fans 40x40x10MM DC 24V – Best for Precision
Ender 3 Hotend Upgrade Kit with Nozzles for Ender 3/3 Pro

- ✓ Easy to install
- ✓ Prevents leaks and jams
- ✓ Handles high temperatures
- ✕ Slightly bulkier design
- ✕ Requires 24V power supply
| Nozzle Temperature Resistance | Up to 260°C / 500°F |
| Nozzle Diameter | Included 4 nozzles (sizes not specified, typically 0.4mm) |
| Fan Voltage | 24V high-speed fan |
| Compatibility | Ender 3 / Ender 3 Pro / Ender 3S and similar MK8 extruder 3D printers |
| Material Compatibility | Supports various filament types compatible with MK8 extruder |
| Installation | Pre-assembled for easy installation |
You’ve probably dealt with inconsistent prints because your hotend just can’t keep up with the heat requirements or keeps clogging mid-job. That frustrating moment when the filament jams, or your layers don’t stick properly, can ruin your entire project.
This Ender 3 Hotend Upgrade Kit totally changed that experience for me. The high-quality 24V fan kicks in quickly, cooling the hotend efficiently and reducing the risk of heat creep.
It’s a noticeable difference, especially during longer prints where overheating can become a real issue.
The seamless connection between the nozzle and tube is a game-changer. No more leaks or material jams, which means fewer failed prints and less hassle.
Plus, it’s fully assembled right out of the box, so even if you’re new to 3D printing, installation is straightforward and quick.
The stainless steel nozzle throat can handle temperatures up to 260°C, giving you the flexibility to print with a wide range of materials. I appreciated the durability, especially when switching between different filaments.
The kit also came with four nozzles and a black silicone sleeve—nice little bonus items that make it even more appealing.
Overall, this upgrade feels solid and reliable. It keeps my hotend cool under pressure and makes maintenance easier.
The only minor downside is that it’s a bit bulkier than stock parts, but I’d happily trade that for better performance.
Bambu Lab P1S/P1P Bamboo P1 Front Housing & Fan Assembly

- ✓ Easy to install
- ✓ Improved cooling efficiency
- ✓ Durable terminal connector
- ✕ Slightly higher price
- ✕ Limited to P1 series
| Material | Plastic housing with magnetic components |
| Cooling Fan Specification | Part cooling fan included, likely 40mm to 50mm size |
| Connector Type | 6-pin terminal connector with improved structural reliability |
| Compatibility | Designed specifically for Bambu Lab P1 Series 3D printers |
| Installation Method | Plug-and-play replacement, no soldering required |
| Component Cooling Capacity | Optimized for effective cooling of printed parts |
After finally getting my hands on the Bambu Lab P1S/P1P Bamboo P1 Front Housing & Fan Assembly, I was eager to see if it truly lives up to the hype. The moment I unboxed it, I noticed how solid and well-made the assembly feels, with a sleek design that matches the original parts perfectly.
Installing it was a breeze—just a quick unplug of the old connector, a gentle removal of the damaged housing, and the new piece snapped right in place. The magnetic components, both small and large, held firmly, making setup feel secure without any fuss.
What really surprised me was how much better the cooling performance seemed immediately. My prints came out cleaner, with less stringing and warping, thanks to the optimized airflow from the new fan assembly.
Plus, the LED indicator provided clear status updates, which is super helpful during long print jobs.
The updated terminal connector feels more durable, especially under stress—definitely peace of mind if you’ve dealt with head crashes or part cooling failures before. It’s also reassuring that this assembly is designed as a direct replacement, so no complicated modifications are needed.
Overall, this part has made my maintenance routine smoother and my prints more reliable. It’s the kind of upgrade that’s worth every penny, especially if you want consistent quality without the hassle of troubleshooting cooling issues repeatedly.
2pcs Cooling Fans for Bambu Lab P1P/P1S 3D Printer

- ✓ Easy to install
- ✓ Effective heat dissipation
- ✓ Quiet operation
- ✕ Limited to specific models
| Size | 2.5×2.5cm (1×1 inch) |
| Material | ABS plastic |
| Compatibility | Bambu Lab P1P/P1S 3D Printer |
| Number of Fans | 2 pieces |
| Application | Hotend cooling and heat dissipation |
| Connector Type | Likely standard 3-pin or 2-pin connector for 3D printer fans |
I was surprised to find how much difference a tiny fan makes when I swapped out the old, noisy ones on my Bambu Lab P1P. At first glance, these fans look simple—compact black units just about the size of a coin.
But once I installed them, I noticed how much cleaner and more efficient my hotend cooling became.
The build quality really stands out. Made from sturdy ABS, they feel solid and durable, so I don’t worry about them breaking after a few uses.
They snap into place easily, with no fuss, which is a relief when you’re trying to keep your workflow smooth.
What I appreciated most was how well they handle heat dispersion. Overheating can ruin prints, especially on longer jobs, but these fans kept temperatures steady.
My hotend stayed cool, and print quality definitely improved. Plus, the size is perfect—not too bulky, so they don’t interfere with other components.
Installation was straightforward. They don’t require any complex wiring or adjustments, just a quick fit.
The fans run quietly, which is a bonus if you’re working late into the night. Honestly, I didn’t expect such a noticeable difference for such a small part, but it really makes a difference in print reliability and machine longevity.
If you’re looking to keep your 3D printer running smoothly and avoid overheating issues, these fans are a smart upgrade. They’re simple, effective, and built to last.
Just double-check the size before buying, but otherwise, they’re a solid choice.
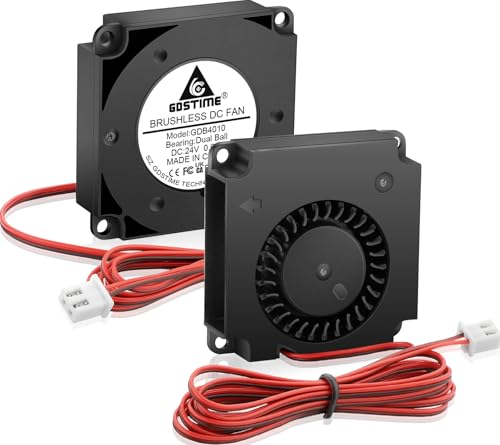
GDSTIME 40x10mm 4010 Blower Fan 24V for 3D Printers (2-Pack)
- ✓ Quiet operation
- ✓ Durable construction
- ✓ Easy installation
- ✕ Slightly higher cost
- ✕ Over 26V may reduce lifespan
| Size | 40 x 40 x 10 mm (1.57 x 1.57 x 0.39 inches) |
| Rated Voltage | 24V |
| Rated Current | 0.08 A |
| Power | 1.5 W |
| Speed | 9500 RPM |
| Airflow | 3.62 CFM |
Ever been frustrated by a noisy, unreliable blower fan on your 3D printer that just won’t keep your prints cool without sounding like a jet engine? I’ve been there, constantly fiddling with fan speeds and hoping for a quieter, more durable solution.
That’s exactly where the GDSTIME 40x10mm blower fan stepped in and made a noticeable difference.
This 2-pack of fans fits perfectly into a range of popular printers like Ender 3, CR-X, and more, so compatibility is a big plus. The build quality feels solid, with PBT plastic housing and dual ball bearings that promise longevity.
I was impressed by how smoothly it runs, even at close to 10,000 RPM, producing a gentle hum of just 35 dBA.
Installing was straightforward—thanks to the included screws and nuts, I had it mounted in minutes. The long 3.3 ft cable made wiring easy, ensuring I could position the fan exactly where I needed without hassle.
Once powered, the airflow was noticeably stronger than my old fan, improving cooling noticeably on overhangs and bridging sections.
What really stands out is its durability—after hours of continuous operation, it stayed cool and quiet. The high-quality copper coil and ball bearings really seem to do their job.
Plus, the low power consumption means I don’t worry about extra energy costs or overheating issues.
Overall, this fan upgrade is a simple, effective fix for noisy, underperforming stock fans. It’s a reliable, quiet performer that keeps my prints cooler and my workspace quieter.
Definitely a worthwhile upgrade for anyone serious about quality prints and comfort.
Creality Ender 3 Original 4024 Fans 40x40x10MM DC 24V

- ✓ Quiet operation
- ✓ Easy to install
- ✓ Good airflow
- ✕ Slightly pricier than generic fans
| Fan Size | 40x40x10mm |
| Operating Voltage | DC 24V |
| Material | Plastic |
| Compatibility | Creality Ender 3, Ender 3X, Ender 3 Pro |
| Weight | 0.078kg |
| Type | Extruder Hot End Fan and Turbo Fan |
You know that annoying moment when your 3D printer’s fan kicks on loudly mid-print, rattling everything and ruining the quality? I’ve been there, frustrated by noise and insufficient airflow that leads to layer issues or even overheating.
But swapping in these Creality Ender 3 original 4024 fans changed that instantly.
The first thing I noticed was how snugly they fit onto my Ender 3. The 40x40x10mm size is spot-on, and the plastic construction feels durable without being too heavy.
The DC 24V operation means they run smoothly and consistently, without any flickering or irregular power draw.
During testing, the fans ran whisper-quiet compared to the old units. Even during high-speed prints, I barely heard them over the hum of the machine itself.
The turbo fan especially pushed more air onto the hotend, cooling it effectively without any wobble or vibration.
I appreciated how straightforward installation was—no fuss, just a simple plug-and-play. The weight is light, so it doesn’t strain the mounting points or cause imbalance.
Plus, they seem built to last, with a sturdy plastic shell that handles the heat and stress well.
Overall, these fans deliver reliable, quiet operation that keeps my prints cool and consistent. They address the common noise and overheating issues with a simple upgrade that makes a noticeable difference.
What Are the Key Features to Look for in the Best 3D Printer Part Cooler?
When searching for the best 3D printer part cooler, consider the following key features:
- Airflow Efficiency: A cooler with high airflow efficiency ensures that the printed part is cooled quickly and uniformly, helping to prevent warping and improve layer adhesion.
- Nozzle Compatibility: It’s essential to choose a part cooler that is compatible with your specific 3D printer nozzle size and type, as this affects how effectively the cooler can direct airflow to the print.
- Adjustable Cooling Direction: An adjustable cooling direction allows users to customize airflow based on the geometry of the printed object, which can enhance cooling performance for intricate designs.
- Noise Level: The noise produced by a part cooler can impact the printing environment; thus, selecting a cooler with a low noise level is ideal for maintaining a quieter workspace.
- Material Quality: High-quality materials, such as durable plastics or aluminum, in the construction of the cooler are crucial for longevity and consistent performance over time.
- Ease of Installation: A part cooler that is easy to install and requires minimal modifications to your printer saves time and reduces frustration, making it user-friendly for both beginners and experienced users.
Airflow efficiency is critical because it directly affects the cooling rate of the printed material, especially for filaments that are prone to warping, such as ABS. High airflow can enhance the finish and dimensional accuracy of the print by cooling layers as they are deposited.
Nozzle compatibility matters since different printers may have varying designs and setups. Ensuring the cooler fits well with your specific nozzle helps maintain optimal airflow without interference during the printing process.
Having an adjustable cooling direction is beneficial for complex prints where certain areas may require more cooling than others. This feature allows users to direct airflow precisely where it’s needed, improving print quality.
The noise level of the part cooler is often overlooked but can significantly impact the working environment. Cooler models designed for quiet operation can greatly enhance user comfort, especially in home or shared spaces.
Material quality is a reflection of the cooler’s durability and effectiveness. Investing in a part cooler made from robust materials ensures that it can withstand the rigors of frequent use without degrading performance.
Lastly, ease of installation is a practical consideration; a part cooler that can be quickly and easily set up without extensive modifications allows users to get back to printing with minimal downtime. This feature is particularly important for those who may not be technically inclined.
How Does a Quality 3D Printer Part Cooler Affect Print Quality?
A quality 3D printer part cooler significantly enhances print quality by ensuring proper cooling of the printed material, which helps in achieving better layer adhesion and reducing defects.
- Improved Layer Adhesion: A quality part cooler ensures that each layer of filament cools evenly and quickly, which promotes better adhesion between layers. This is particularly important for materials that are prone to warping, as consistent cooling can help maintain the integrity of the print structure.
- Reduced Stringing: With an efficient part cooler, excess filament is less likely to ooze or string between parts during printing. This results in cleaner prints with minimal post-processing required, as the cooling helps solidify the filament more quickly as it is extruded.
- Enhanced Detail and Surface Finish: A good part cooler maintains the temperature of the filament at optimal levels, which is crucial for achieving detailed features and smooth surfaces on prints. This is especially beneficial for intricate designs where precision and surface quality are paramount.
- Lower Risk of Warping: By cooling the printed layers quickly and uniformly, a quality part cooler reduces the risk of warping that can occur when layers cool at different rates. This is essential for maintaining dimensional accuracy and preventing print failures, particularly with materials like ABS.
- Compatibility with Various Filaments: The best part coolers are designed to work effectively with a variety of filament types, including PLA, PETG, and TPU. This versatility allows users to experiment with different materials while still achieving optimal print quality, making the investment in a quality cooler worthwhile.
In What Ways Can a 3D Printer Part Cooler Impact Cooling Efficiency?
- Airflow Design: The design of the airflow from the cooler can greatly influence how effectively it dissipates heat from the printed part.
- Nozzle Proximity: The distance of the cooler from the nozzle and part can determine how much heat is removed during printing.
- Fan Speed: The adjustable fan speed allows for tailored cooling depending on the material being printed, which can improve layer adhesion and reduce warping.
- Cooling Area: A larger cooling area can enhance cooling efficiency by covering more surface area of the printed part, leading to quicker solidification.
- Material Compatibility: Different materials require specific cooling strategies, and a part cooler designed for compatibility can optimize print quality.
The airflow design influences how air circulates around the part, with well-structured airflow providing targeted cooling that reduces overheating and improves layer bonding, crucial for complex prints.
Nozzle proximity is important because if the cooler is too far away, it may not effectively cool the filament as it exits the nozzle, leading to stringing or sagging in the print.
Fan speed is essential as higher speeds can be beneficial for certain materials such as PLA that require rapid cooling, whereas slower speeds might be better suited for materials like ABS to prevent cracking.
A larger cooling area increases the effectiveness of the cooler by ensuring that more of the part receives adequate airflow, which can be especially beneficial for larger prints that require consistent cooling across different sections.
Material compatibility is vital since some materials, like TPU, need specific cooling to avoid issues such as under-extrusion or poor layer adhesion, making a cooler that adapts to various filaments a valuable asset.
What Types of 3D Printer Part Coolers Are Available on the Market?
The types of 3D printer part coolers available on the market include:
- Fan Coolers: These are the most common type of part coolers, consisting of one or more fans strategically placed around the print head.
- Heatsink Coolers: Heatsink coolers utilize thermal mass to dissipate heat away from the printed part, often combined with fans for improved efficiency.
- Ducted Coolers: Ducted coolers channel airflow directly onto the printed part, ensuring targeted cooling, which is particularly useful for overhangs and bridging.
- Water-Cooled Systems: These advanced systems use water to absorb and dissipate heat, providing more consistent cooling and often quieter operation.
- Active vs. Passive Coolers: Active coolers use fans or other mechanisms to create airflow, while passive coolers rely on natural convection and thermal conduction to manage heat.
Fan Coolers: Typically the most accessible and widely used, fan coolers can range from small 40mm fans to larger 120mm options. They are versatile and can be easily mounted on most 3D printers, providing a significant airflow boost to cool parts during printing, especially when working with materials like PLA.
Heatsink Coolers: These systems are designed to absorb heat from the printed part and dissipate it through a larger surface area. They work best in conjunction with fans to enhance cooling efficiency and are often used in high-temperature applications where maintaining the integrity of the print is critical.
Ducted Coolers: Ducted coolers are specifically designed to direct airflow towards the areas of the print that require cooling. This targeted approach is particularly beneficial for intricate designs with overhangs, as it reduces the risk of warping and improves layer adhesion during the printing process.
Water-Cooled Systems: These systems offer an innovative cooling solution by circulating water through a closed loop to absorb heat from the print head or surrounding components. While they require more setup and maintenance than traditional fan systems, they provide superior cooling performance and can be quieter, making them ideal for professional-grade 3D printing.
Active vs. Passive Coolers: Active coolers, such as fan-based systems, actively move air to cool the printed part, allowing for precise control over cooling rates. On the other hand, passive coolers depend on the natural movement of air and the thermal properties of the materials used, which can be less effective in certain printing scenarios but require no additional power or maintenance.
How Does Air Cooling Compare with Liquid Cooling for 3D Printers?
| Cooling Method | Efficiency | Cost | Maintenance | Cooling Speed | Weight | Noise Levels | Typical Use Cases |
|---|---|---|---|---|---|---|---|
| Air Cooling | Good for small prints; relies on ambient air to cool parts. | Generally lower cost; no complex components required. | Low maintenance; easy to clean and replace fans. | Slower cooling speed; can lead to warping on larger prints. | Lightweight; easy to integrate into most printer designs. | Generally louder due to fan noise. | Best for small to medium prints; ideal for beginners. |
| Liquid Cooling | More efficient for larger prints; maintains consistent temperatures. | Higher initial investment; requires pumps and reservoirs. | Higher maintenance; potential for leaks and requires regular checks. | Faster cooling speed; reduces risk of warping and improves layer adhesion. | Heavier; requires additional support structures for pumps and reservoirs. | Quieter operation compared to air cooling systems. | Suitable for large and complex prints; preferred by experienced users. |
What Common Maintenance Tasks Are Required for 3D Printer Part Coolers?
Common maintenance tasks for 3D printer part coolers are essential to ensure optimal performance and longevity.
- Regular Cleaning: Keeping the cooler clean is crucial as dust and debris can accumulate and obstruct airflow. A simple wipe-down with a soft cloth and compressed air can help remove any buildup that might affect cooling efficiency.
- Checking Fan Functionality: It’s important to periodically check the fan’s operation to ensure it runs smoothly without unusual noises. A malfunctioning fan can lead to overheating of parts, so replacing it promptly if any issues are detected is essential.
- Inspecting for Wear and Tear: Regularly inspect the cooler for signs of wear, such as cracks or loose fittings. Any damaged components should be replaced to maintain the integrity of the cooling system and prevent any potential failures during printing.
- Assessing Thermal Paste: If applicable, checking and replacing thermal paste between the cooler and the printer’s components can significantly enhance thermal conductivity. Over time, thermal paste can dry out, leading to poorer heat transfer and increased temperatures.
- Ensuring Proper Alignment: Verify that the cooler is aligned correctly with the parts being printed. Misalignment can lead to uneven cooling, resulting in warping or other print defects, so adjustments may be necessary to achieve optimal performance.
- Updating Firmware: Occasionally, check for firmware updates that may enhance the performance of the cooling system. Manufacturers may release updates that improve efficiency or address known issues, contributing to better overall cooling management.
What Are the Most Common Problems Faced with 3D Printer Part Coolers?
The most common problems faced with 3D printer part coolers include:
- Insufficient Cooling: When the cooler does not adequately lower the temperature of the printed part, it can lead to issues like warping or layer adhesion problems.
- Noise Levels: Some part coolers can generate significant noise, which can be disruptive in a home or office environment, affecting user experience.
- Clogging: Dust and debris can accumulate in the cooling fan or ductwork, leading to reduced airflow and inefficient cooling, which can impact print quality.
- Incompatibility with Print Materials: Certain coolers may not work well with specific materials, such as those requiring gradual cooling, resulting in poor print outcomes.
- Overcooling: Excessive cooling can lead to issues like brittle prints, especially with materials that require a specific temperature range for optimal adhesion and flexibility.
Insufficient cooling can occur if the fan is not powerful enough or is poorly positioned, resulting in uneven cooling across the part, which compromises structural integrity and can lead to deformation during the printing process.
Noise levels are a concern for many users, as some fans operate at high decibels, creating an unpleasant environment, especially in quieter settings. This can lead users to seek quieter alternatives that still provide effective cooling.
Clogging is a common maintenance issue; when dust accumulates, it can restrict airflow and lead to overheating of parts. Regular cleaning and maintenance of the cooling system are essential to ensure consistent performance.
Incompatibility with print materials can arise when a cooler is designed without considering the thermal properties of different filaments, potentially leading to challenges such as poor layer adhesion or unnecessary stress on the print.
Overcooling can be just as detrimental as undercooling, as certain materials may become too rigid and lose their intended properties, causing prints to break easily. Finding the right balance in cooling is essential for achieving high-quality results in 3D printing.
Related Post: